

What you will accomplish
You will change where one car is parked so the Cars list, the car record, and the Parking Spots map all show the same spot. Expected outcome: A green success message confirms the move, and the Select car area shows the vehicle in its new spot.When to use the Move Car page
- You are walking the lot and moving several cars in a row.
- Someone shared a link that opens Move Car with a car already chosen.
- You came from the parking map and want to finish the assignment on a focused form.
- You prefer searching for cars and spots on one screen instead of opening each car detail page.
Before you start
- Know which car is moving.
- Know which spot or zone it is moving to. Check Parking Spots first if you are unsure what is open.
- Move the physical car before—or at the same time as—you update the record so the map stays trustworthy.
Open the Move Car page
1
Go to Move Car
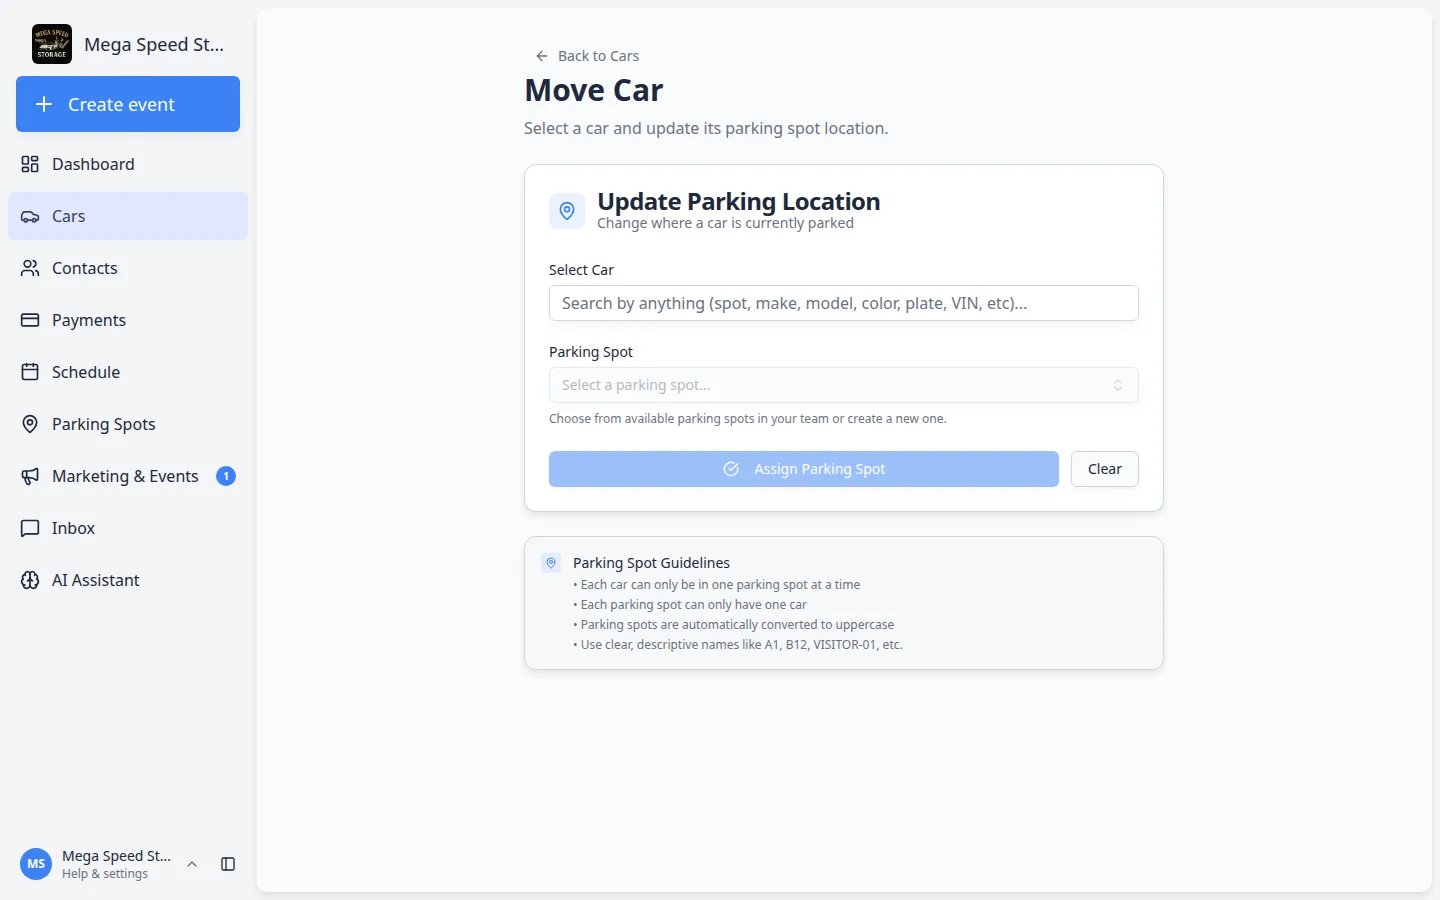
Open Move Car from your browser. You can bookmark this page if your team uses it often during lot walks.Expected result: You see the title Move Car with the subtitle Select a car and update its parking spot location.
2
Use Back to Cars when you are done
Click Back to Cars at the top left anytime to return to the full Cars list.
Move a vehicle
1
Select the car
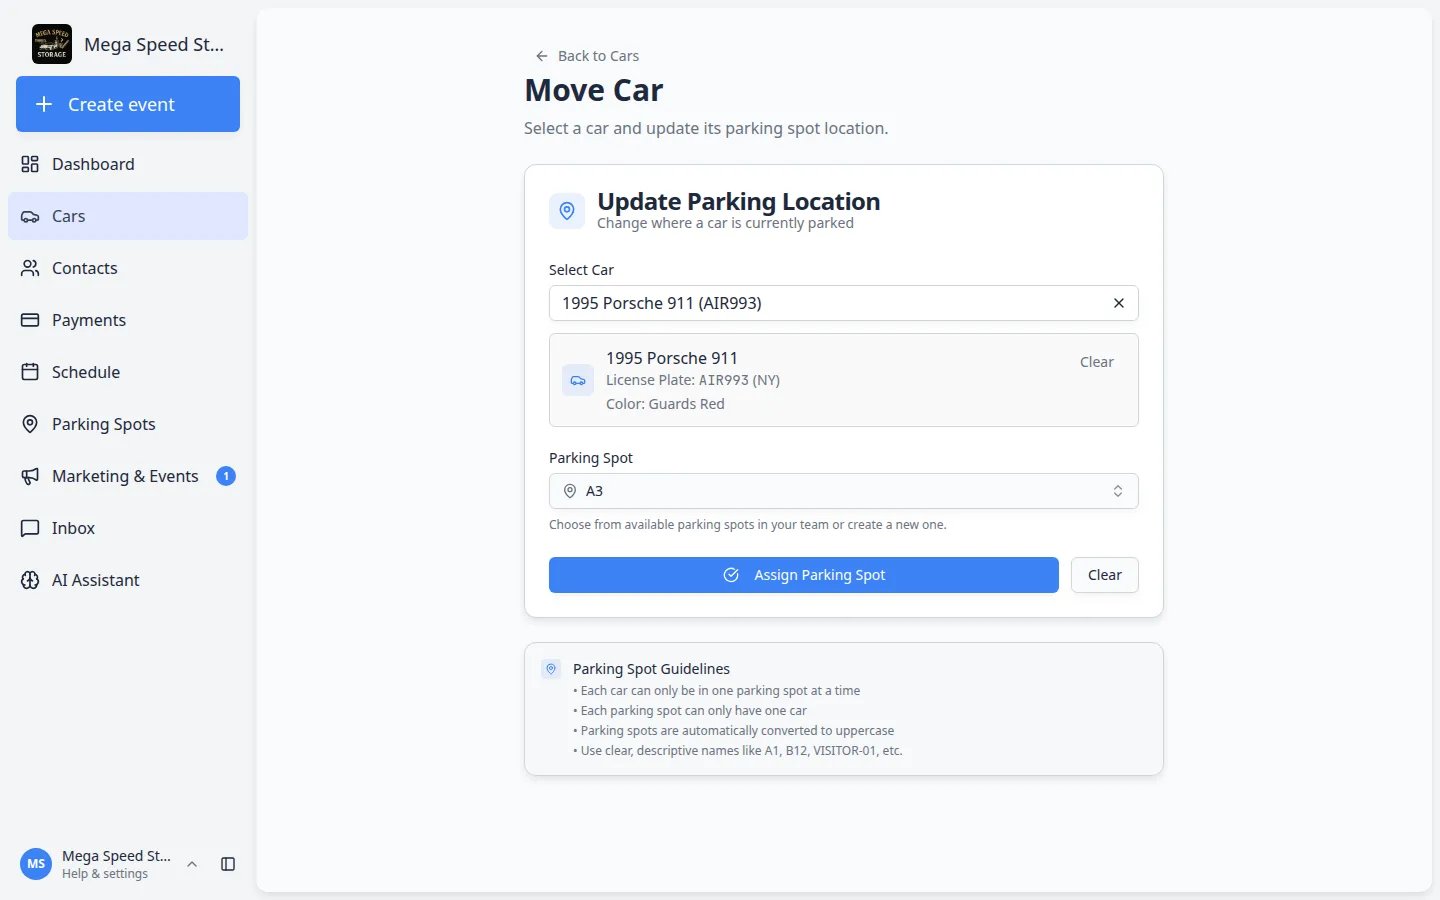
In the Select car field, start typing anything you know—plate, spot, make, model, color, VIN, or customer name. Pick the correct vehicle from the list.Expected result: A summary box appears below the search field showing the car’s year, make, model, plate, and color.
2
Choose the parking spot
In the Parking Spot field, search for the destination—for example A3 or Outdoor Lot.A dropdown list shows matching spots from your Parking Spots floor plan. Pick the row that matches the real bay where the car is parked.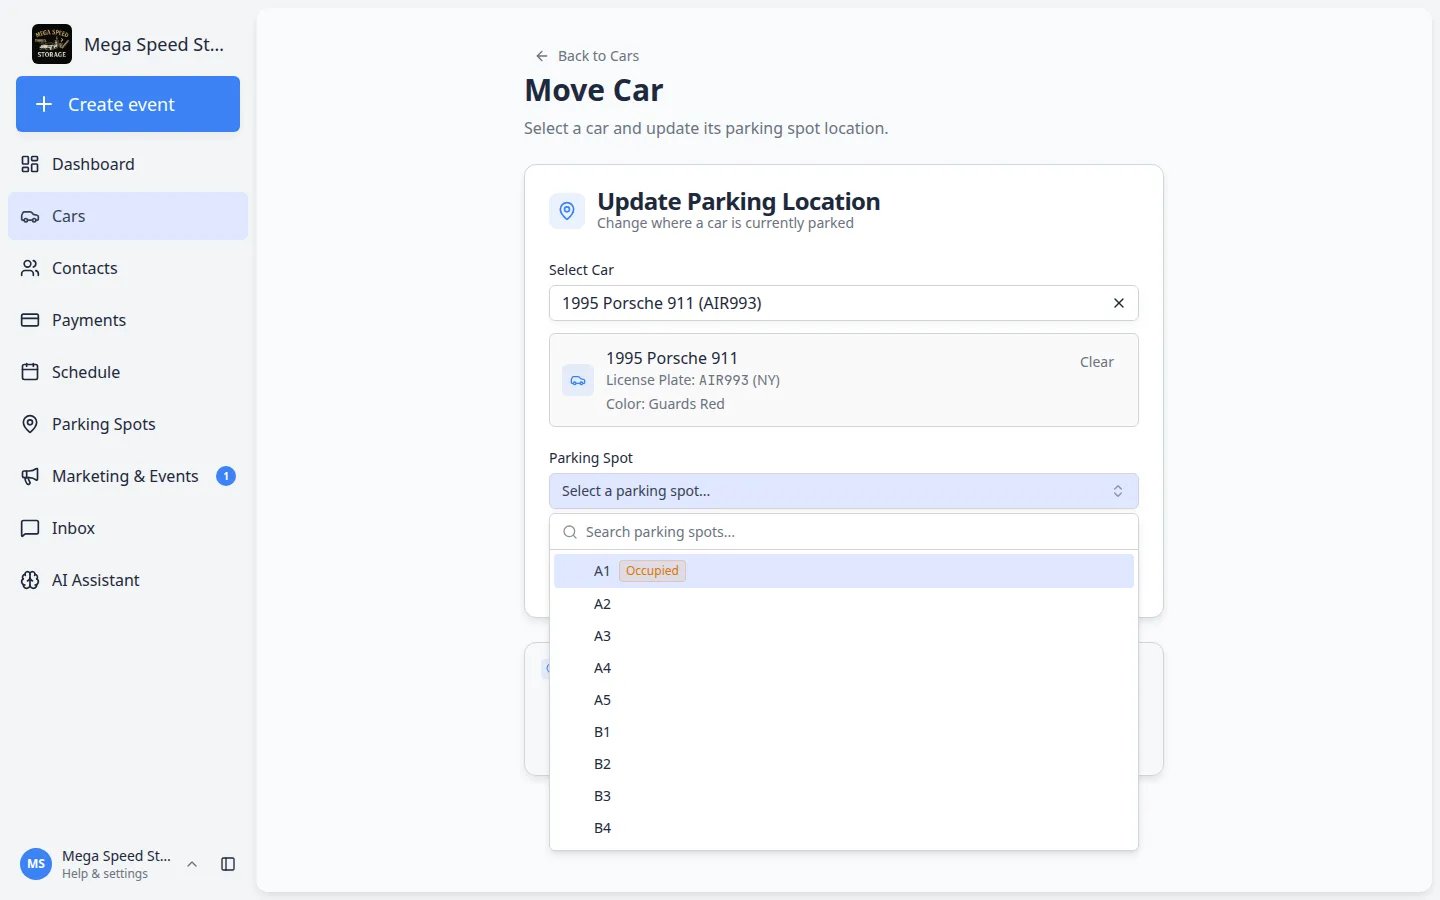
3
Click Assign Parking Spot or Move Car
Click the blue button at the bottom of the card.
- Assign Parking Spot — the car did not have a spot yet
- Move Car — the car is leaving one spot for another
4
Read the confirmation message
Pause for one second and read the green message at the top of the card.Why this matters: If the message mentions the wrong spot, fix it right away before the next teammate trusts the map.
5
Move the next car or clear the form
To move another vehicle, click Clear (or change the Select car field) and repeat the steps.Expected result: The form is ready for the next car without old spot data carrying over by mistake.
6
Confirm on the parking map (recommended)
Open Parking Spots and search for the spot you just chose.Why this matters: A five-second map check catches typos before the next teammate trusts the wrong location during a customer pickup.
Open Move Car with a car already selected
Sometimes a link includes the car ID—for example when you tap Move from a parking map or an internal tool.1
Follow the link
When the page loads, the Select car field may already show the vehicle name and plate.
2
Pick only the new spot
Choose the destination in Parking Spot, then click Assign Parking Spot or Move Car.Expected outcome: You skip searching for the car and finish the move in one step.
Troubleshooting
What to do next
- Verify the spot on the Parking Spots map matches the real floor.
- If the move was part of intake or delivery, continue with Start a car session or Review car activity, notes, and photos.