

What you will accomplish
You will open a scheduled appointment’s workflow from Schedule and finish the on-site work your facility tracks there—photos, checklists, vehicle condition, notes, and status updates. When you finish, the calendar and Progress view show the same event with an honest status (In Progress or Done).When to use Open Event
- The visit is today (or underway) and a technician should run the job in the app—not only look at the calendar block.
- Your event type requires photos, checklists, or vehicle status fields during the visit.
- Front desk scheduled the appointment and the floor team needs the full workflow screen.
Open Event is not for every calendar blockCalendar Block and some simple events may not show Open Event. Needs Approval bookings show Approve or Decline first—see Approve or decline a customer booking request. All day visits that use a workflow still show Open Event—look for them in the ALL DAY row. See Create an all-day event.
Before you start
- Sign in to the staff dashboard (not the customer portal).
- The event already exists on Schedule with the correct vehicle, customer, and time (or All day if there is no clock time).
- You know which bay or team member is doing the work (assign the event first if that helps your shop).
- If photos are required, use a phone or tablet with a good camera when possible.
Open the workflow from Schedule
1
Open Schedule
Go to Schedule from the left sidebar.Expected result: You see the calendar (or the view you used last—Table, Whiteboard, or Progress).
2
Click the scheduled visit
Click the colored event block for the visit you are running.Use the Search box or Assigned to me if the calendar is busy. See Find and filter scheduled work.Expected result: A detail panel opens on the right (or over the calendar on smaller screens). You see the date, time, customer, vehicle, notes, and action buttons.
3
Look for Open Event
Near the top of the panel, look for Open Event next to actions such as Edit Event or status controls.Why this matters: Open Event is the door to the workflow. Edit Event only changes the plan (time, assignee, notes)—it does not replace the workflow screen.Expected result: You see Open Event on event types that use workflows (many service and intake types do).
4
Click Open Event
Click Open Event.Expected result: The app opens the workflow page (the address bar includes
/dashboard/session/). You leave the calendar view and land on the job screen for this visit.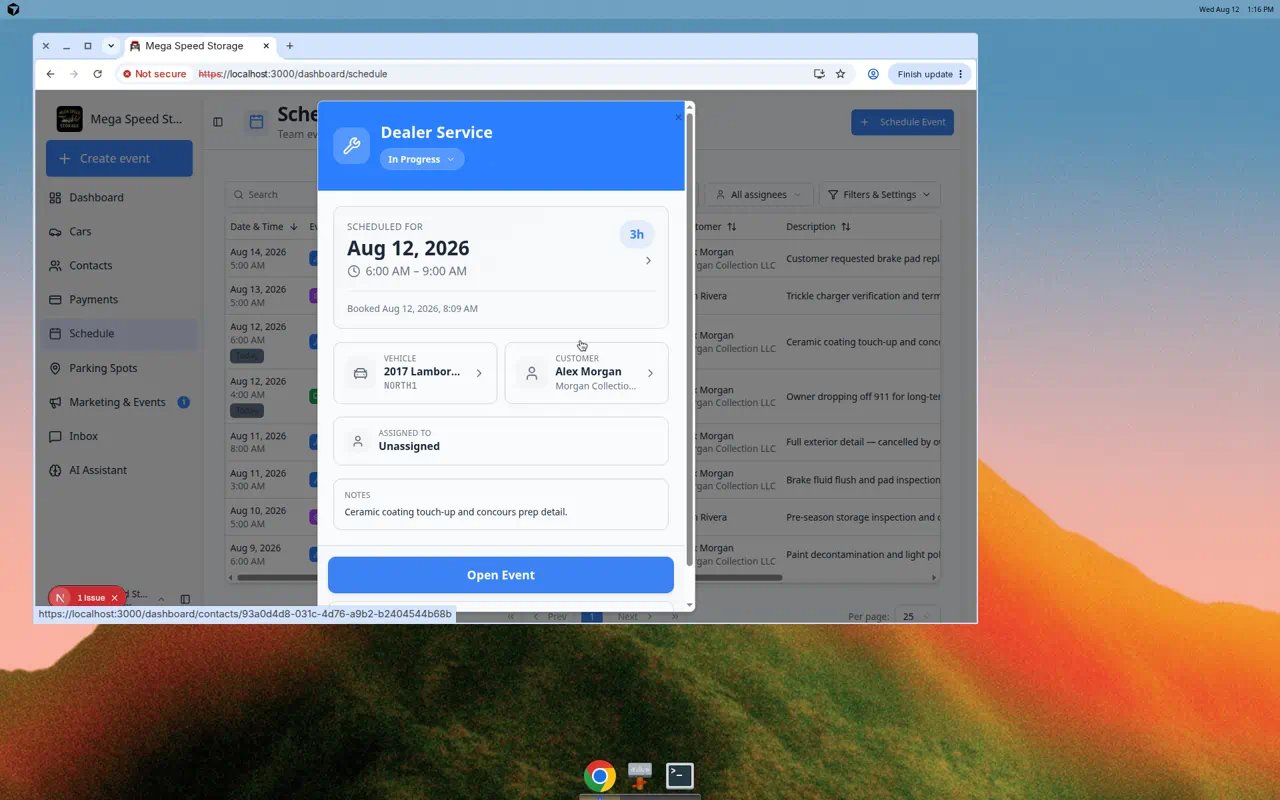
Work through the workflow page
Each facility configures different steps. Most workflow pages include some mix of the sections below. The page address includes/dashboard/session/—that is normal.
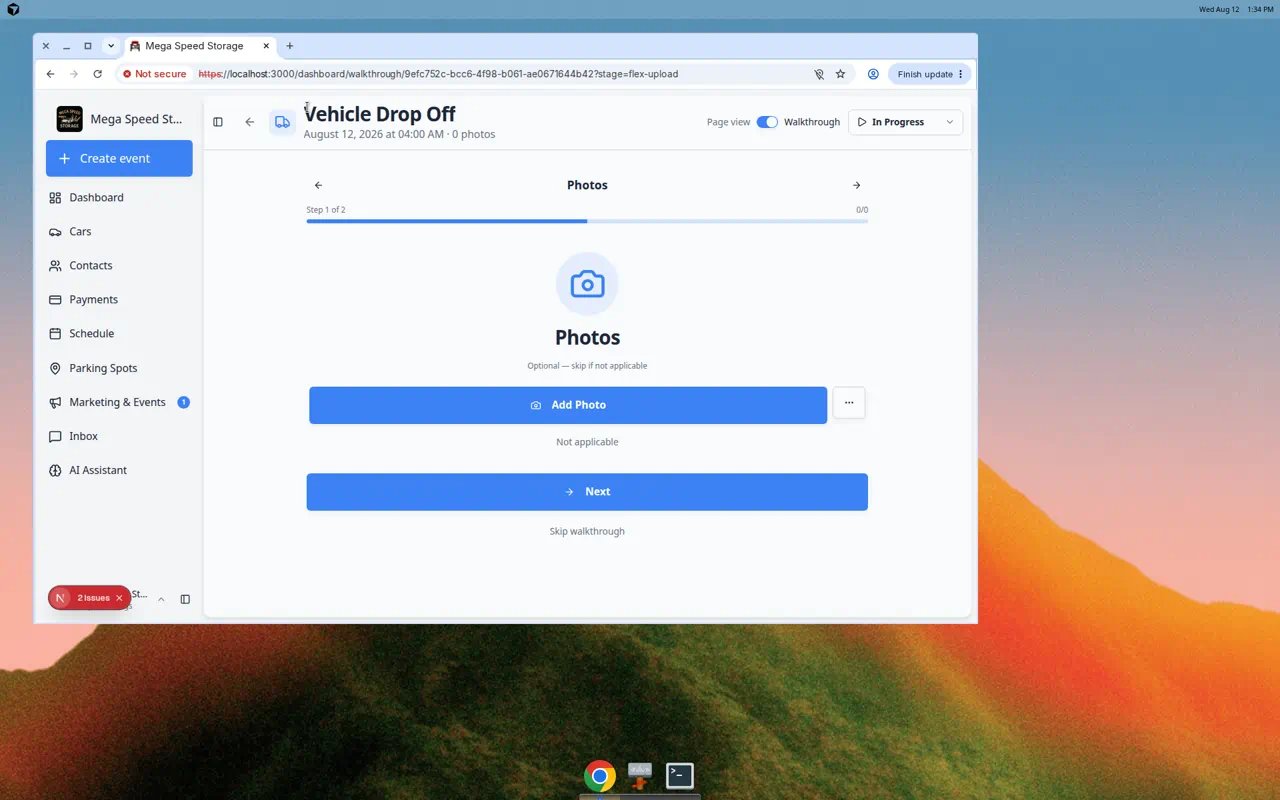
You can switch between two layouts on many workflow screens:
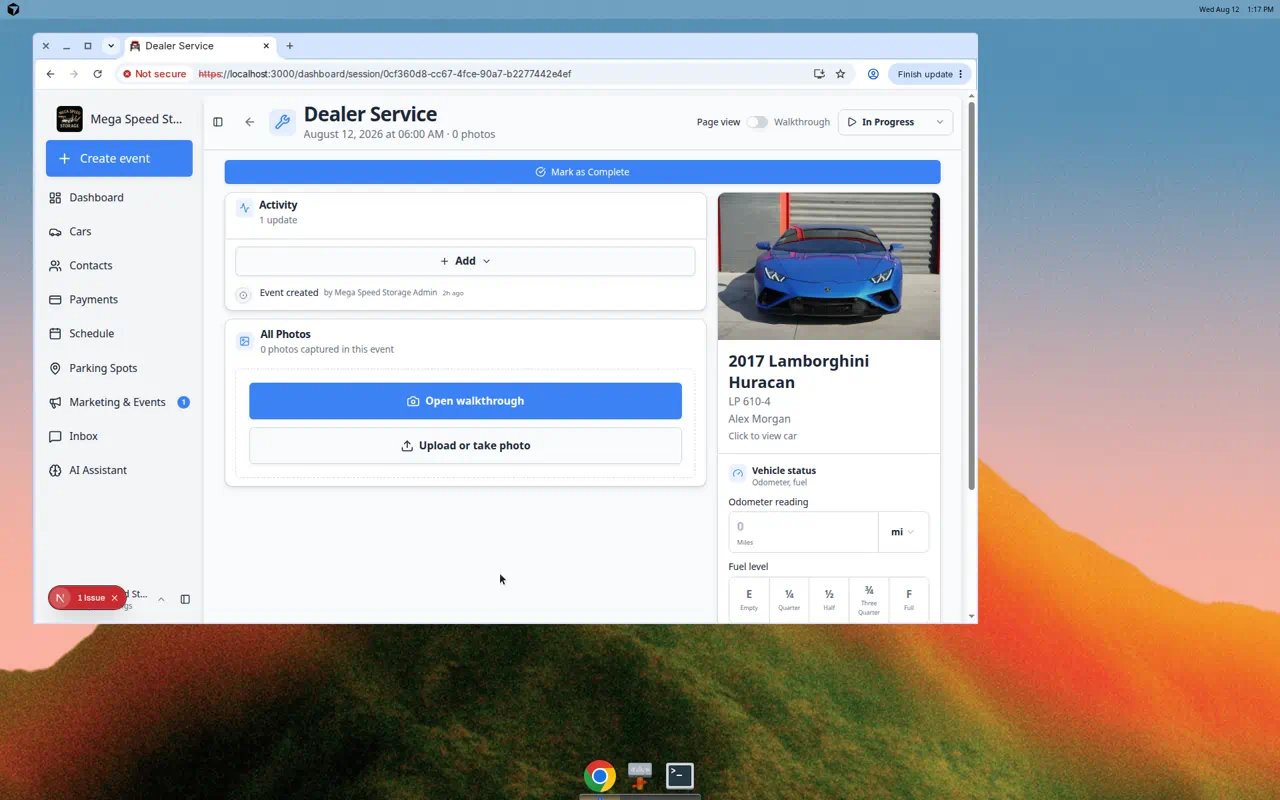
Standard view shows sections such as STATUS, ACTIVITY, All Photos, and Vehicle Status on one scrollable page.Walkthrough view shows one step at a time—helpful on a phone when a technician should not skip ahead of required photos or checklists.
1
Find the view toggle
Near the top of the workflow page, look for Walkthrough view or Standard view (wording may vary).Expected result: Tapping Walkthrough view changes the layout to a step-by-step flow.
2
Use Walkthrough view on the floor
Choose Walkthrough view when:
- A new hire is learning your intake process.
- Photo rules must be completed in order.
- The screen is small and scrolling is awkward.
3
Switch back to Standard view when done
Managers reviewing a visit often prefer Standard view because every section is visible at once.Expected result: You can move between views without losing saved photos or notes.
1
Confirm you have the right vehicle
At the top, read the event title and notes. On the right, check the vehicle card (year, make, model, and owner).Why this matters: Starting the wrong workflow is a common mistake when two similar cars are in the building.
2
Move through the STATUS steps
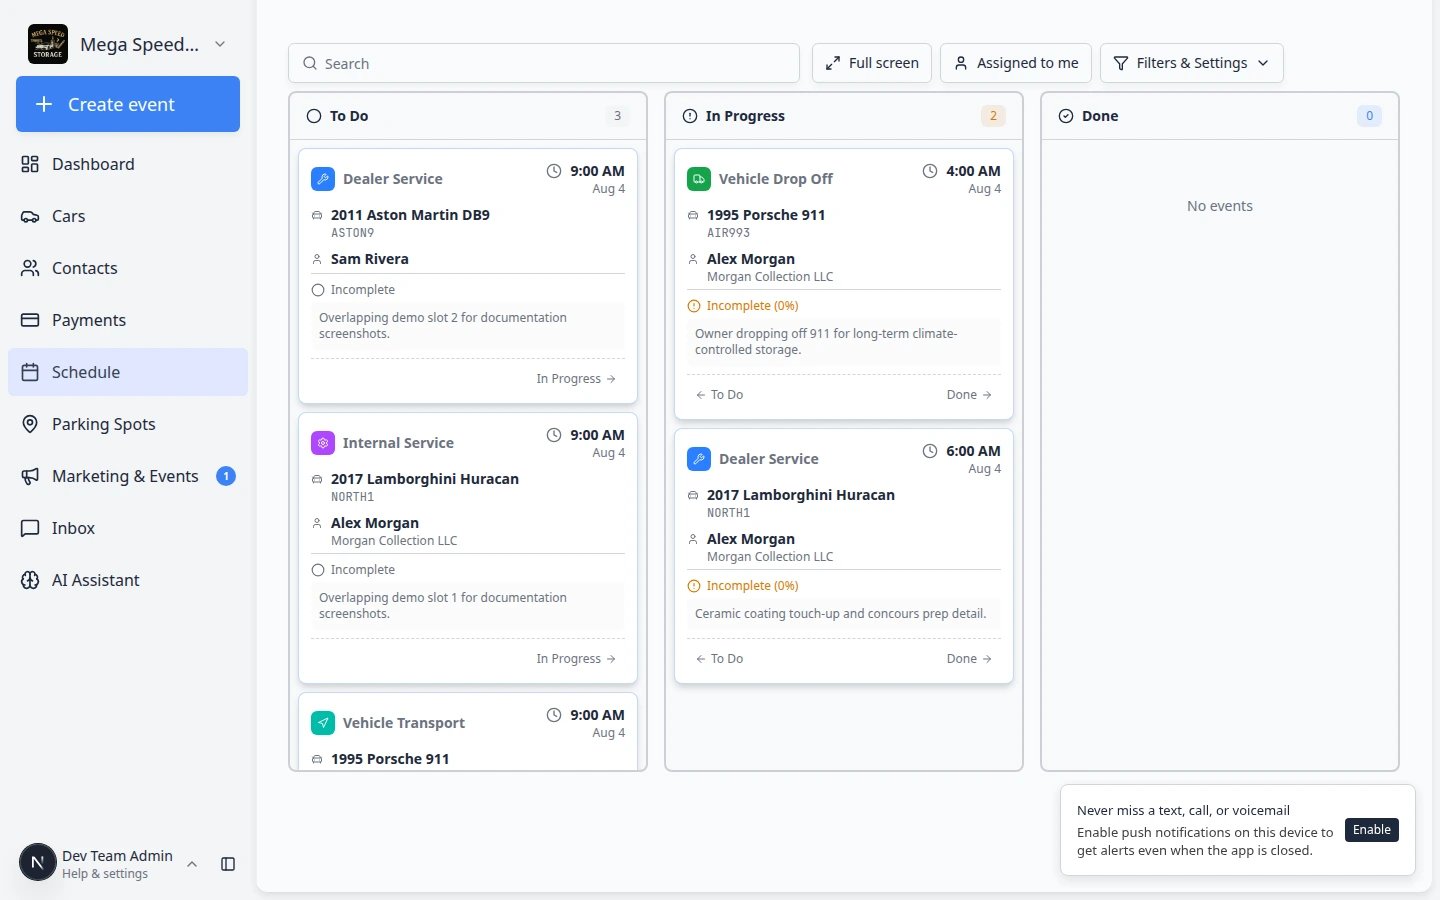
Look for the STATUS section with To Do, In Progress, and Done. The current step is highlighted (you may see a NOW badge on In Progress).Expected result: Progress view and the calendar stay aligned with the floor when status changes.
3
Add photos in All Photos
Scroll to All Photos. Click + Add Photos to capture condition shots from your phone or tablet camera.Why this matters: Photos taken here stay tied to this visit. They are easier to find later than photos saved only on a personal camera roll.Expected result: The photo count at the top of the page increases (for example 3 photos).
4
Complete checklists when your event type includes them
Some event types show checklist items or extra steps in the ACTIVITY area. Follow each prompt and save as you go.Note: Not every event type has checklists. If you do not see any, your admin may not have required them for that service.
5
Record vehicle status on the right
Under Vehicle Status, enter Odometer Reading, tap a Fuel Level button (E, ¼, ½, ¾, or F), and use Record for tire pressure when asked.Expected result: The customer record and workflow history reflect what your team observed today.
6
Leave notes in ACTIVITY
Click + Add in the ACTIVITY section for anything the office or next shift must know (delays, damage found, parts ordered).Expected result: The next teammate does not need a verbal handoff to understand what happened.
Use walkthrough for step-by-step photos
Some event types use photo rules—a guided list of shots your team should capture (front, rear, interior, damage areas, and similar). You can start walkthrough two ways:- Click Continue in walkthrough on the main workflow page (under All Photos).
- Click Walkthrough view near the top of the workflow page to switch the whole screen to one step at a time.
1
Look for Continue in walkthrough or Walkthrough view
On the workflow page (after you click Open Event), scroll to All Photos or look near the top for Walkthrough view.If you see Continue in walkthrough, your facility wants photos taken in a guided order.Why this matters: Walkthrough mode shows one photo step at a time so technicians do not skip required angles.
2
Start the guided flow
Click Continue in walkthrough or Walkthrough view.Expected result: The app opens a step-by-step photo screen. The address bar may include
/dashboard/walkthrough/. You see one location or angle at a time with clear instructions and a Next button.3
Capture each required photo
Follow each prompt. Use your phone or tablet camera when possible. Tap Next to move forward.Expected result: The photo count on the main workflow page increases as you finish steps.
4
Return to the main workflow when finished
When walkthrough is complete, use the browser Back button or open Schedule and click the same event again.Expected result: All Photos shows the images you captured. You can add extra photos with + Add Photos if your team allows it.
Mark the visit complete
1
Review your work
Before you finish, confirm required photos are taken and vehicle readings look correct. If your event type requires a checklist, scroll through ACTIVITY and confirm each step is done.Why this matters: Marking complete too early can skip customer notifications or leave billing out of sync.
2
Click Mark as Complete
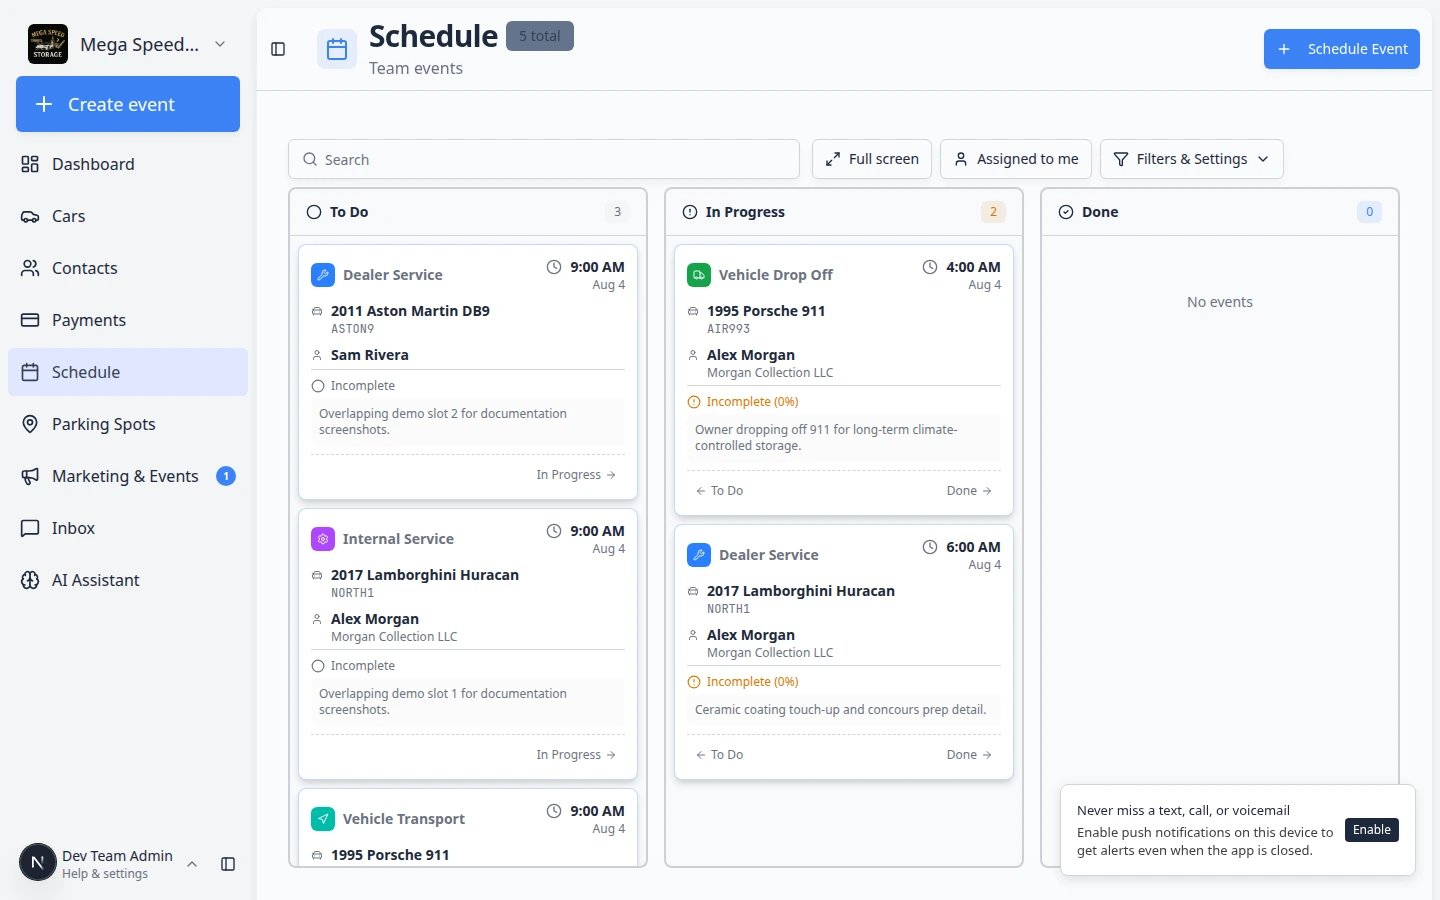
Near the top-right of the workflow page, click the blue Mark as Complete button.Expected result: Status moves to Done or Complete. The event appears in the Done column on Progress view.
3
Go back to Schedule
Click Schedule in the sidebar, or use the browser Back button.Expected result: The same event still appears on the calendar, now with an updated status.
What success looks like
- The correct vehicle and customer were opened from the calendar.
- Required photos and checklist steps were completed (or intentionally skipped only when your policy allows).
- Status on the workflow page matches reality (In Progress while working, Done when finished).
- Managers can trust Progress view without asking the floor for verbal updates.
Troubleshooting
What to do next
- Track the rest of today’s jobs in Track work in the Progress view.
- Change the plan (time, assignee, notes) in Update, assign, or reschedule an event.
- Return to Schedule overview.