

What you will accomplish
You will create a custom form: a simple web page where customers answer questions you choose (event interest, service waitlist, feedback, and more). When you are done, you will have a shareable link and a Published form ready for your website, email, or front desk.Forms are not the same as campaigns or registrationA campaign sends a message out to customers. Customer registration is the built-in storage signup flow on your public website.Use Forms when you need a custom question list that is separate from your main storage registration page. For example, use a form for a car-show interest survey or a detail-service waitlist.
When to use a custom form
- You want to collect answers from people who visit your website or open house, not only existing customers.
- You need a short survey (event interest, service waitlist, feedback after a visit).
- You want a link or QR code the front desk can hand out without building a full campaign email first.
- Your standard storage registration form does not ask the questions you need.
Before you start
- You can open Marketing & Events from the dashboard sidebar.
- You know the questions you want to ask (keep the list short: five questions or fewer works best for most customers).
- You decided who may fill out the form: anyone with the link, signed-in customers only, or invite-only.
Step 1: Open the Forms tab
1
Open Marketing & Events
From the dashboard sidebar, click Marketing & Events. You can also open Marketing & Events directly.Why this matters: Forms live in the same Marketing & Events section as campaigns and community tools so your team can plan outreach in one place.
2
Click Forms
Near the top of the page, click the Forms tab. You can also open Marketing & Events > Forms directly.Expected result: You see the Forms heading, a New form button, and a list of forms your team has already created (or an empty state if this is your first form).
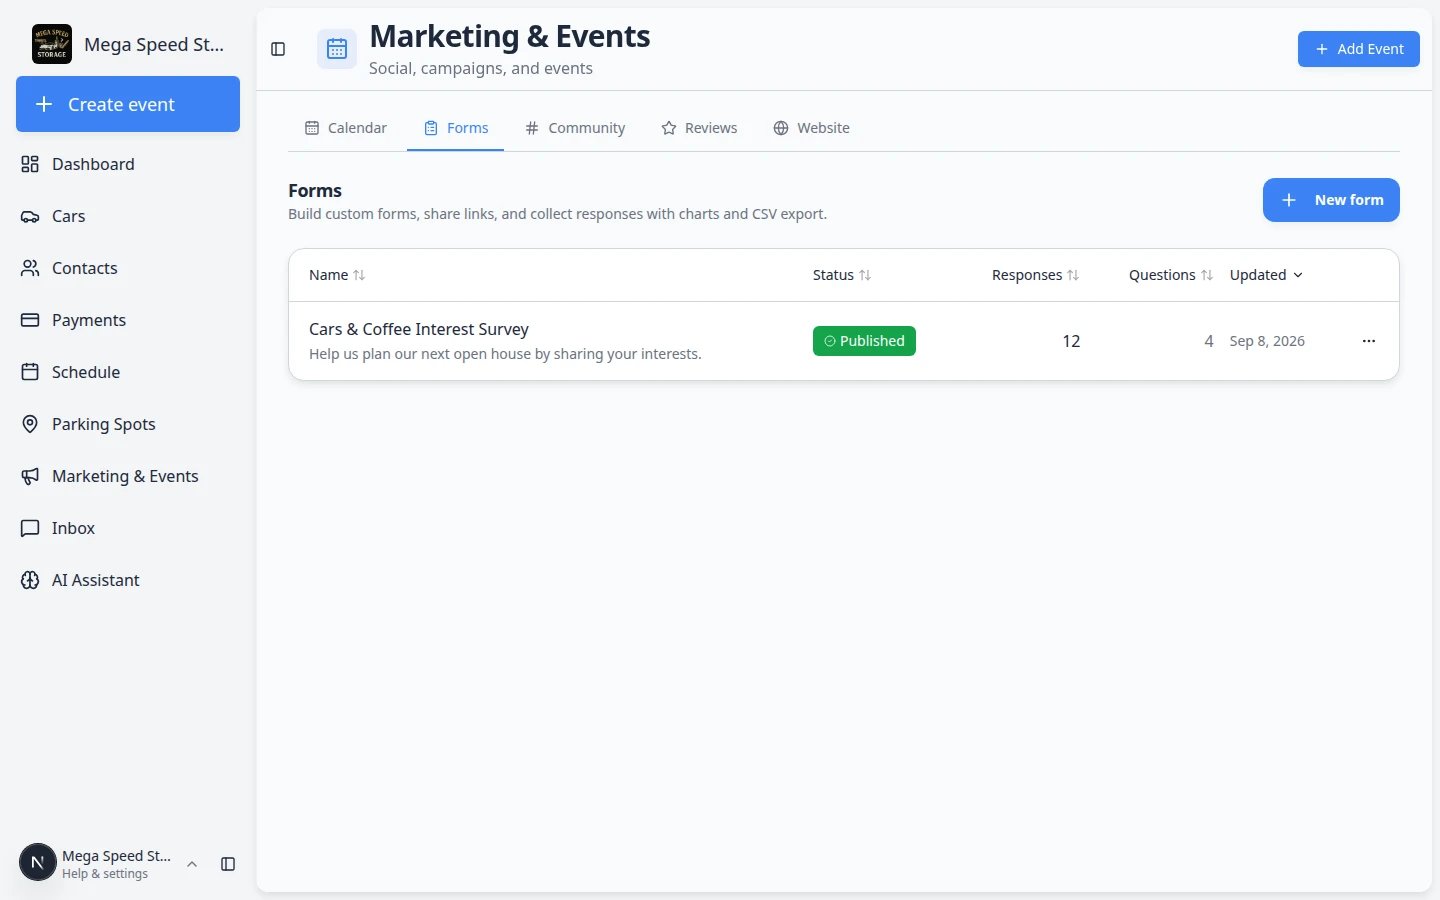
Step 2: Create a new form
1
Click New form
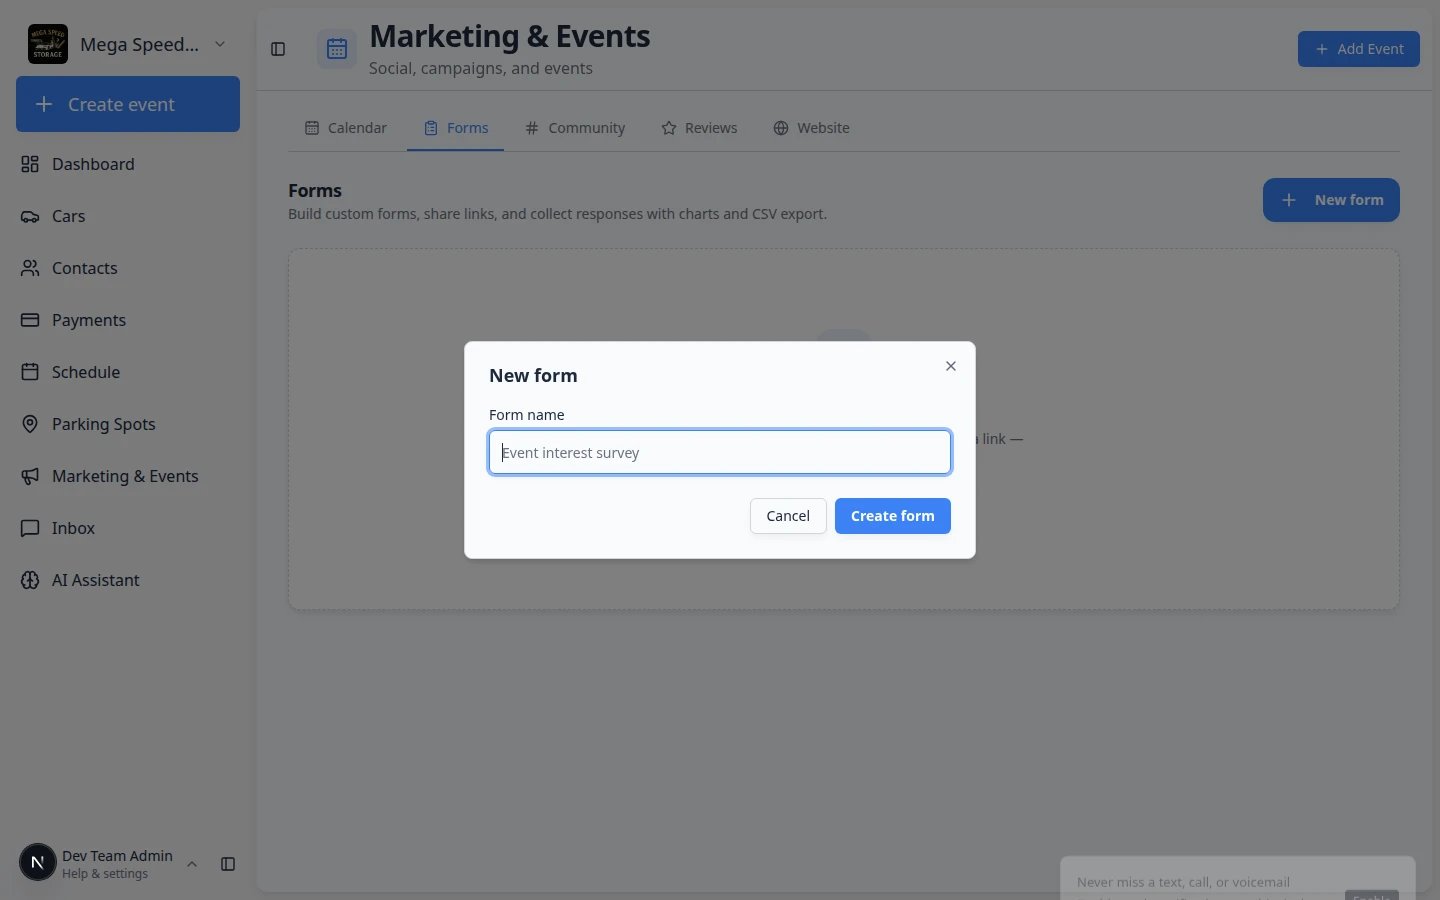
Click New form in the top-right area of the page.Expected result: A window titled New form opens.
2
Enter a form name
In Form name, type a name your team will recognize later. Customers may see this title on the public page.Good examples:
- Cars & Coffee Interest Survey
- Detail Service Waitlist
- Open House Feedback
3
Click Create form
Click Create form at the bottom of the window.Expected result: The window closes and you land on the form editor for the form you just created.
Step 3: Add your questions
The editor opens on the Questions tab. Everything saves automatically as you type. You do not need a separate Save button.1
Review the Questions tab
Make sure Questions is selected near the top of the editor.Expected result: You see a list of question cards (or one empty card ready for your first question).
2
Add a question
Click Add question to add a new short-text question. Open the question card and use Answer type to choose the type you need:
- Short text — one-line answers (name, car model).
- Long text — paragraphs (comments, special requests).
- Number — counts (how many vehicles you store).
- Single choice — pick one option from a list.
- Multiple choice — pick more than one option.
- Vehicle — collect make, model, year, VIN, insurance, and related details. When the submission is linked to a customer, a car is created automatically.
- Contacts — collect additional contacts (spouse, bookkeeper, etc.) and add them to the customer record.
- Documents — upload files such as registration, insurance, or license; they are saved to the customer (and linked to the new car when the form also includes a Vehicle block).
3
Write the question label
Click a question card to expand it. Type the Question: the words customers see above the answer box.Example: Which events interest you most?
4
Mark required questions
Turn on Required for questions customers must answer before they can submit.Expected result: Required questions show a marker on the public form.
5
Reorder if needed
Drag the handle on the left side of a question card to move it up or down.Why this matters: Put the easiest questions first so customers are more likely to finish the form.
Step 4: Set who can fill out the form
1
Open the Settings tab
Click Settings near the top of the form editor.
2
Add a short description (optional)
In Description, explain what the form is for. Example: Tell us which events you would like to attend this season.Expected result: The description appears under the form title on the public page.
3
Choose who can fill out this form
In Who can fill out this form, pick one option:
- Anyone with the link — best for website visitors and open-house guests.
- Signed-in customers only — only people logged into your customer portal.
- Invite link only — only people who have your special invite link (shown in Advanced settings).
Contact details and Advanced optionsOn the Questions tab, turn on Name, Email, and Phone number under Contact details when you want anonymous visitors to leave contact info. Signed-in customers are filled in automatically.Open Advanced on the Settings tab when you need a custom success message, a close date, a response limit, logo display, or related options.When to use Advanced:
- Close date — stop accepting answers after your event signup period ends.
- Response limit — cap how many people can submit (useful for waitlists with a fixed number of spots).
- Success message — show a custom thank-you line after someone submits (for example, “Thanks! We will email you before the next Cars & Coffee.”).
- Show logo — display your team logo at the top of the public form, with size and alignment controls.
Step 5: Publish and share the link
1
Turn on Published
Near the top-right of the form editor, flip the Published switch to on.Expected result: The badge changes from Draft to Published. Only published forms accept new responses.
2
Open the share menu
Click Share (or the share icon) next to the Published switch.From the menu you can:
- Copy link — paste into email, text, or your website.
- Open link — see the live public page in a new tab.
- QR code — download a QR image for posters or the front desk.
3
Add a website embed (optional)
From the Share menu, look for an embed or website option when your team wants the form on your facility website.Why this matters: Visitors can answer questions without leaving your site. You still review answers on the Results page in the dashboard.Expected result: You copy a small code snippet for your web person, or follow your facility’s website guide at Add a website embed.
4
Test the form yourself
Open the public link in a new browser tab. Answer every required question and submit once.Expected result: You see your success message (or a thank-you screen). When you return to the Forms list or open Results, the test response appears there.
What success looks like
- The form shows Published on the Forms list.
- You can open the public link without signing in (when visibility is Anyone with the link).
- A test submission appears on the Results page.
- Your team knows where to find answers: Review form responses and export.
Remove a form you no longer need
1
Open the Forms list
Go to Marketing & Events > Forms.
2
Open the row menu
Find the form row. Click the three-dot menu (⋯) on the right side of the row.
3
Choose Delete
Click Delete and confirm when the app asks.Why this matters: Deleting removes the form from your list. Export responses first with Review form responses and export if you still need the answers.Expected result: The form no longer appears on the Forms tab. The public link stops accepting new responses.
Recipe: replace a paper vehicle information sheet
Use this when a signed-in customer should add another car (plus insurance details and docs) without filling a PDF.1
Create a customers-only form
Set Who can fill out this form to Signed-in customers only so the submitter is already a contact in your CRM.
2
Add a Vehicle block
Add a question with answer type Vehicle. Click Use vehicle sheet preset to turn on license plate, registration, insurance, mileage, fair market value, intake date, and special instructions, matching a typical paper sheet.
3
Add Documents (optional)
Add a Documents block and select types such as registration, insurance, and license. Uploaded files are saved on the customer and linked to the new car.
4
Add additional contacts (optional)
Add a Contacts block if the sheet also collects a spouse or other related contact.
5
Publish and share
Publish the form and share the link or QR from the customer portal or front desk. On submit, the car (and contacts/documents) are created on that customer automatically.
Common mistakes to avoid
- Do not share the dashboard editor link. Customers cannot use it. Copy the public link from Share.
- Do not leave the form in Draft and wonder why no one can submit answers.
- Do not add twenty questions. Shorter forms get more completed responses.
- Do not forget to tell the front desk which form link to use for each event or promotion.
Troubleshooting
What to do next
- Review form responses and export — read answers, view charts, and download a CSV.
- Embed a custom form on your website — show the same form on your public facility page.
- Create a campaign — email customers who should fill out the form.
- Marketing & Events overview — see how forms fit with campaigns, events, and community.