

What you will accomplish
- Spot conversations that include a reschedule request.
- Read the customer’s message before changing anything on the schedule.
- Update the appointment on Schedule and confirm the new time with the customer.
Before you start
- You should have permission to view Inbox and Schedule.
- Know which car and appointment the customer is asking about.
- If you are not sure which event to move, open the customer’s record in Contacts or search Schedule before replying.
Find a reschedule request in the conversation list
In the conversation list on the left side of Inbox, some rows show a small orange Reschedule badge near the time. This badge appears when the most recent preview text starts with Reschedule proposed:. That usually means the customer (or the system on their behalf) asked to change an appointment time. You may also see the words Reschedule proposed: in the gray preview line under the customer name, even before you open the conversation.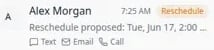
Why the badge helpsYour team can scan the list and spot scheduling changes without opening every conversation. This is especially helpful on busy mornings.
Read the full message first
1
Open Inbox
Go to Inbox.
2
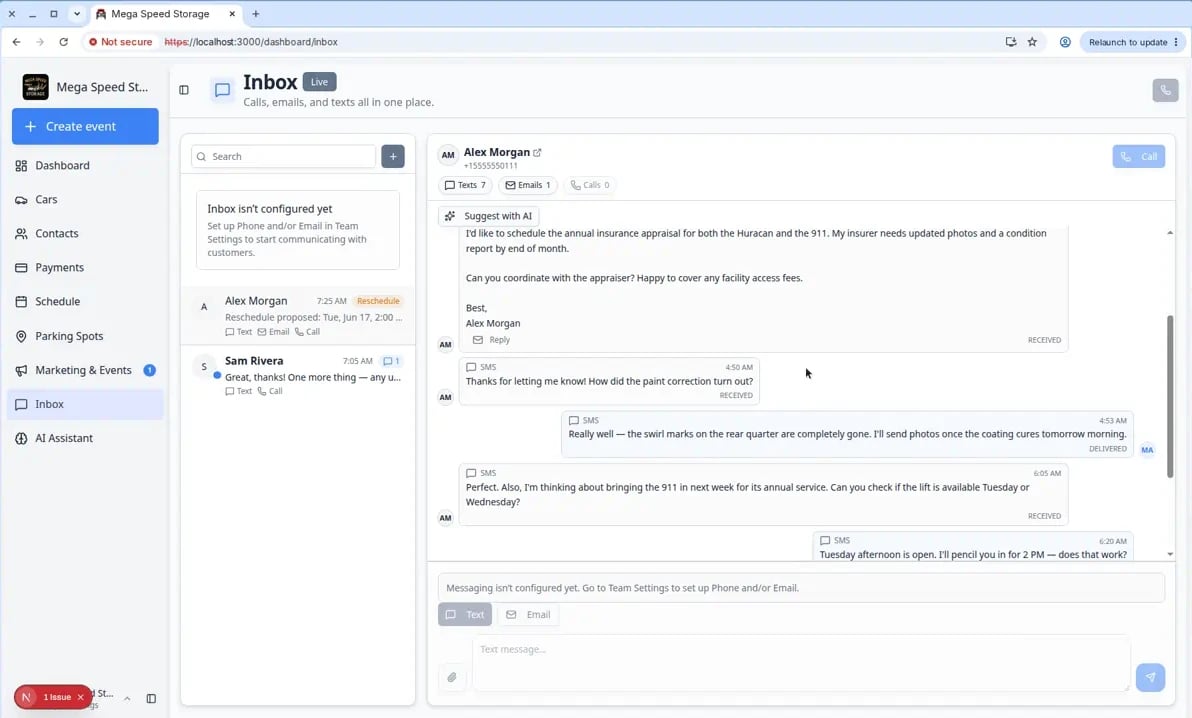
Click the conversation with Reschedule
Select the customer row that shows the Reschedule badge.
3
Read the timeline
Scroll through the recent texts, emails, or calls.Confirm:
- Which vehicle the customer mentioned
- The old time and the new time they want
- Any special instructions (for example, “after 2 PM only”)
Update the appointment on Schedule
After you understand the request, make the calendar change in Schedule. Do this before you send the final confirmation text or email.1
Open Schedule
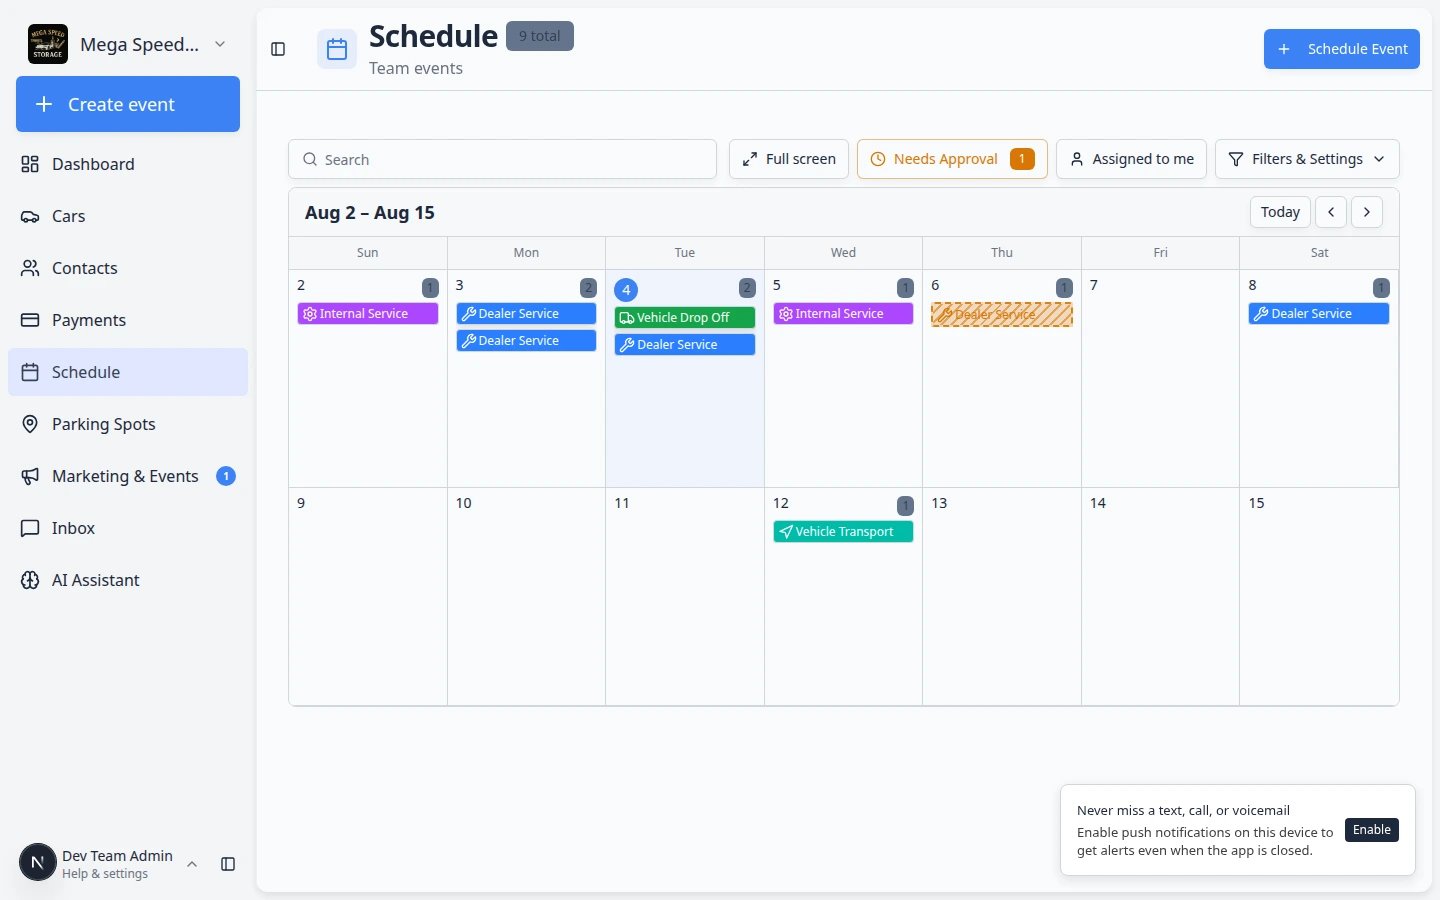
Go to Schedule from the left sidebar.Expected result: You see your facility calendar with colored appointment blocks.
2
Find the appointment
Use Search at the top of Schedule and type the customer name, car name, or event type (for example Detail or Service).You can also browse the week view until you find the block at the old time shown in the Reschedule proposed: message in Inbox.Why this matters: The reschedule message usually shows both the old time and the new time. You need to find the event at the old time first, then change it to the new time.
3
Click the event on the calendar
Click the appointment block once.Expected result: An event detail panel or dialog opens showing the car, customer, date, time, and event type.
4
Change the date and time
Follow Update, assign, or reschedule an event to set the new date and time your team can honor.Match the time you plan to tell the customer—do not guess.Expected result: The form shows the new date and time before you save.
5
Save the change
Click Save (or the save button your team uses on the event form).Expected result: The appointment block moves on the calendar to the new day and time.
Confirm the new time with the customer
Return to Inbox and send a short confirmation after the calendar is correct.1
Open the same customer conversation
Click the customer row in the conversation list (for example Alex Morgan).Expected result: You see the full message history, including the Reschedule proposed: line.
2
Choose Text or Email
Click Text for a quick confirmation. Click Email if you need to recap several details or attach information.See Send a text message from Inbox or Send an email from Inbox for exact composer steps.
3
Write a clear confirmation
Include:
- The vehicle name when the customer has more than one car
- The new day and exact time (for example Thursday at 2 PM)
- What to do if the new time does not work (for example Reply here)
4
Send the message
Review once, then send.Why this matters: The customer should hear the same date and time that now appears on your calendar. One clear confirmation closes the loop and reduces “which time is it really?” follow-up texts.Expected result: Your confirmation appears in the timeline. The Reschedule badge may clear after newer outbound messages update the preview.
- Include the vehicle name when the customer has more than one car.
- State the new date and exact time (for example, Thursday at 2 PM).
- Tell the customer what to do if the new time does not work.
Example confirmation textHi Alex, we moved the Huracan service to Thursday at 10 AM. Reply here if you need a different time.
When your team proposed the new timeSometimes the Reschedule proposed: message came from your facility (for example when a lift conflict forced a move). In that case, ask the customer to confirm the new time: “Does Thursday at 10 AM still work for you?”
When a customer proposes a new time in writing
Sometimes the customer texts the time they want instead of tapping a reschedule link. You may not see an orange Reschedule badge in that case.1
Read the customer's exact words
Look for phrases such as “Can we move to Thursday?” or “2 PM no longer works.”Expected result: You know the day and time the customer is asking for before you change Schedule.
2
Update Schedule first
Follow the steps in Update the appointment on Schedule above.
3
Confirm in Inbox
Send a short reply that states the new day and exact time. Include the vehicle name when the customer has more than one car.
Badge vs plain textThe orange Reschedule badge appears when the latest preview starts with Reschedule proposed:. A normal customer text without that wording still needs the same Schedule-then-confirm workflow—just without the badge hint in the list.
What success looks like
- The appointment on Schedule matches what you told the customer.
- The customer received a clear confirmation in Inbox.
- Your team can see the full conversation history if the customer follows up again.
If the customer proposed a time you cannot offer
1
Check Schedule before you promise a slot
Open Schedule and confirm the time is actually open.
2
Reply with two or three real options
Example: “Thursday 10 AM is full. We can do Thursday at 2 PM or Friday at 9 AM—which works better?”Why this matters: It is better to offer real times than to agree to a slot your team cannot staff.