

What you will accomplish
You will use the Assigned to control on Schedule to connect each event to the right people:- Team members on your staff (detailers, porters, service managers).
- Vendors you work with (outside detail shops, transport companies, mechanics).
When to assign someone
- You already know which staff member will run the visit.
- An outside partner will pick up, service, or deliver the vehicle.
- A manager wants each technician to filter Schedule to Assigned to me at the start of the day.
- Handoffs matter—notes explain what to do; assignment explains who owns it.
- The visit is All day (no clock time). Someone still needs to own it, or Assigned to me will hide it.
Before you start
- Team members already exist in Settings > Team.
- Vendors already exist in Contacts > Vendors when you plan to assign outside partners. See Manage vendors.
- You can open Schedule and click Schedule Event, or open an existing event and click Edit Event.
Assign when you create a new event
1
Open Create New Event
On Schedule, click Schedule Event.Expected result: The Create New Event window opens.
2
Fill in event type, customer, and time
Choose the Event type, vehicle or customer, date, and time the same way you normally would. See Create an appointment if you need the full walkthrough.
3
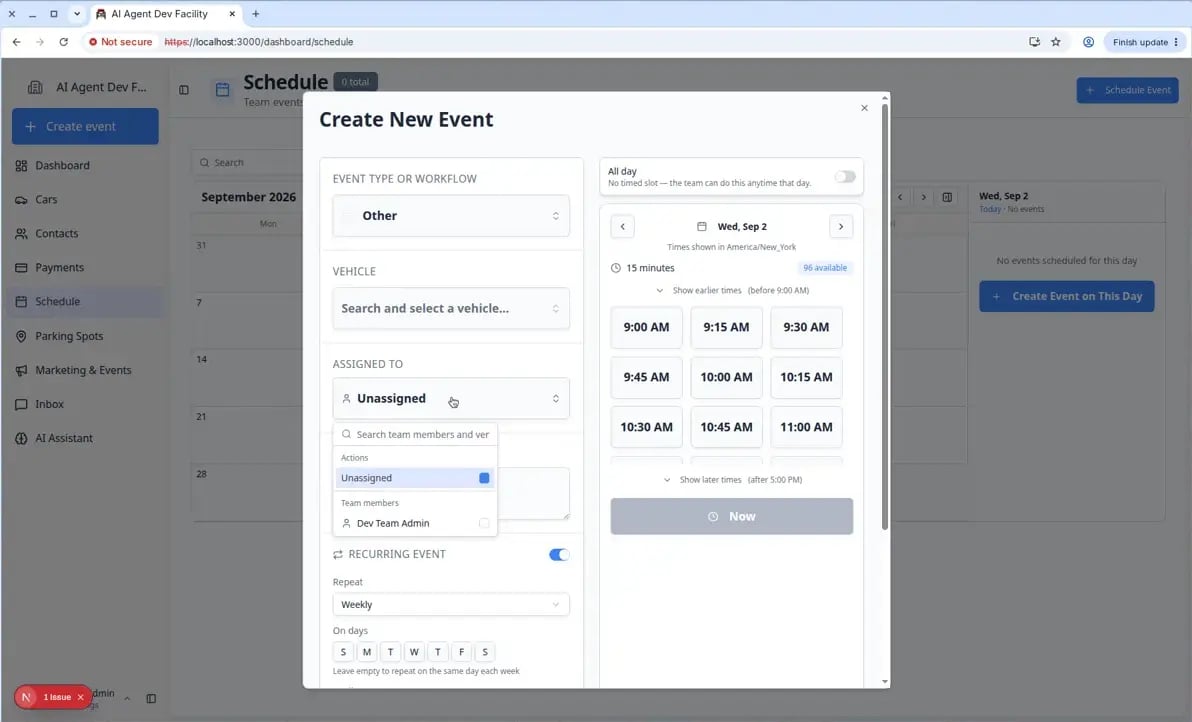
Open the Assigned to control
Find Assigned to on the left side of the form. It may show Unassigned when no one is selected yet.Click the Assigned to button.Expected result: A searchable list opens with Team members and Vendors sections.
4
Select team members and/or vendors
Click one or more names to place a check mark next to them.
- Team members show a person icon.
- Vendors show a building icon and usually the company name (for example Elite Detail Partners).
5
Click Create Event
Finish the rest of the form and click Create Event.Expected result: The event block shows the assignee summary. Team members can turn on Assigned to me to see only their work.
Change assignment on an existing event
1
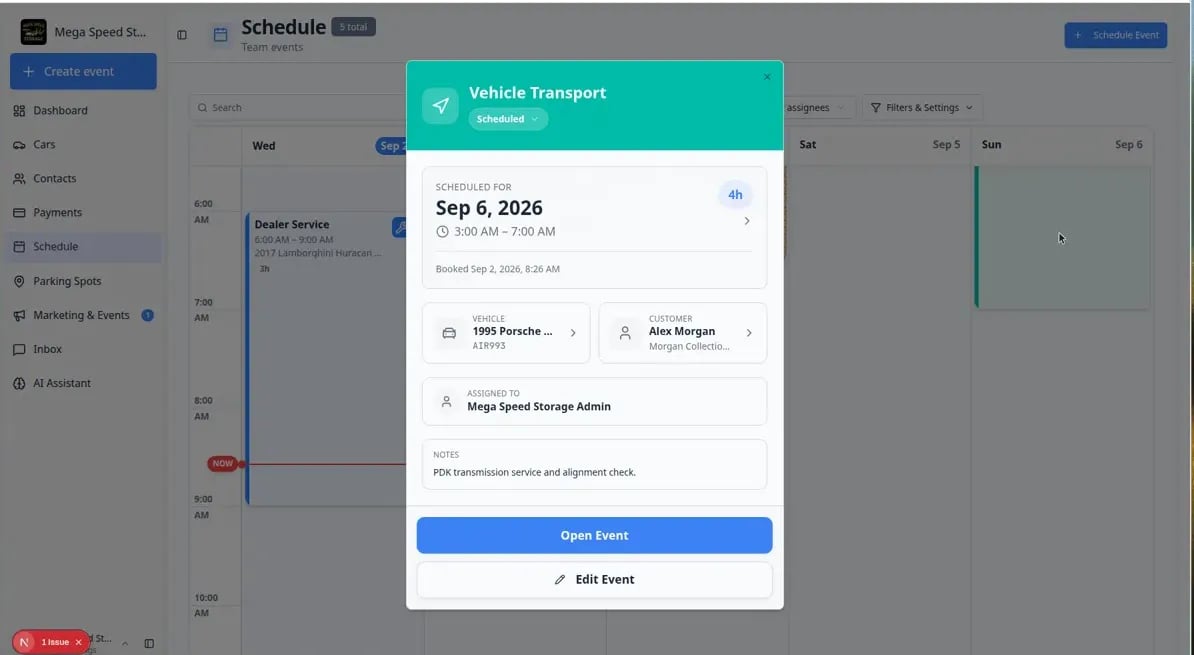
Click the event on Schedule
Find the event on Schedule and click it.Expected result: The event detail panel opens on the right (or as a sheet on smaller screens).
2
Review who is assigned today
Near the top of the panel, look for assignee names or Unassigned.Expected result: You see staff names, vendor company names, or a building icon for outside partners.
3
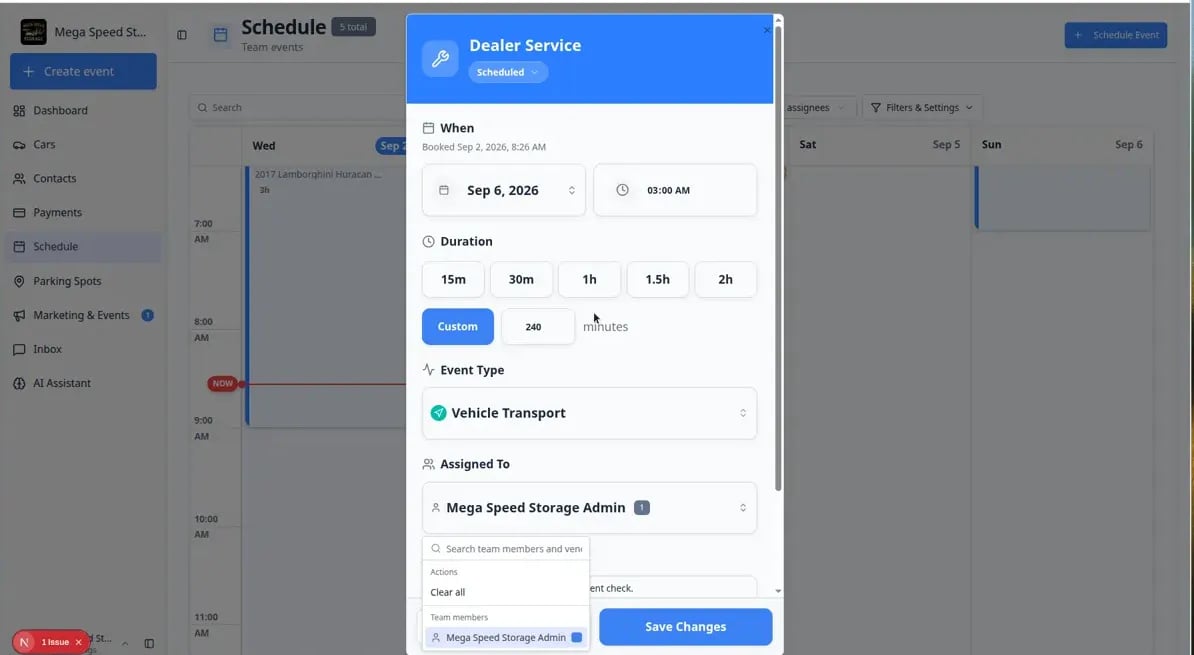
Click Edit Event
Click Edit Event in the panel.
4
Update Assigned to
Open the Assigned to control, add or remove team members and vendors, then save.Expected result: The calendar and Progress board show the new owners immediately.
Filter to your own work (Assigned to me)
Technicians and porters often start the day by hiding everyone else’s events.1
Open Schedule
Go to Schedule.
2
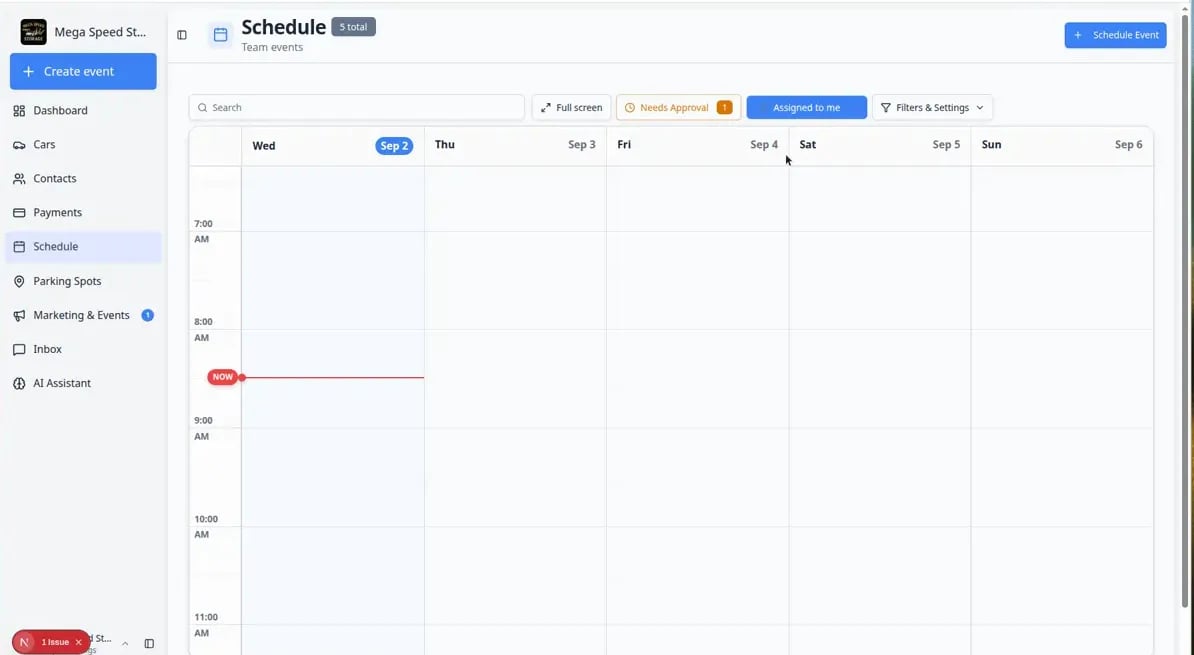
Click Assigned to me
Near the top of the page, click Assigned to me.Expected result: The calendar, table, or progress view shows only events assigned to your staff account.
3
Turn the filter off when you need the full team view
Click Assigned to me again (or choose All / clear the filter) to see every visit.Why this matters: Managers usually keep the full calendar visible; individual techs use Assigned to me as a personal to-do list.
How assignments look on the calendar
One staff member — the event may show their name on the block or card.One vendor — look for the building icon or company name in the assignee summary.Several people — the summary may shorten to two names plus a count (for example Alex +1).Unassigned — the event is still on the calendar, but no one is responsible yet. Managers often filter these during morning planning.
Assign vendors for transport and off-site work
Transport runs and outside detail visits are common reasons to pick a vendor instead of (or in addition to) a staff member.- Choose an event type such as Vehicle Transport or Dealer Service when the work happens off-site.
- Assign the transport or detail vendor in Assigned to so dispatch knows who is responsible.
- When the vehicle physically leaves your building, also update parking on the car record—see Send a car to an outside vendor.
Common mistakes to avoid
Troubleshooting
What to do next
- Create the event: Create an appointment
- Schedule work with no clock time: Create an all-day event
- Change time or notes later: Update, assign, or reschedule an event
- Add vendor records: Manage vendors
- Track off-site vehicles: Send a car to an outside vendor