

What you will accomplish
You will use a zone on the Parking Spots map to see how many cars are inside a flexible area, add a vehicle to that area, or move a car out—without picking an exact numbered spot like A1 or B4. When you finish, your team can answer questions like “Is there still room in the outdoor lot?” and “Which cars are in overflow right now?” without walking the building first.When to use a zone (and when to use a numbered spot)
- Use a numbered spot when staff need an exact location for retrieval, customer updates, or billing tied to a specific space.
- Use a zone when cars can park anywhere inside a larger area and an exact box number is not required.
- Use both on the same map — numbered spots inside a zone show exact spaces; the colored zone background shows the flexible overflow area around them.
Before you start
- Your facility map should already include at least one zone. If not, an admin can add zones in Set up parking spots and zones.
- The car should exist in Cars before you add it to a zone.
- Know whether the car needs an exact spot or only a general area.
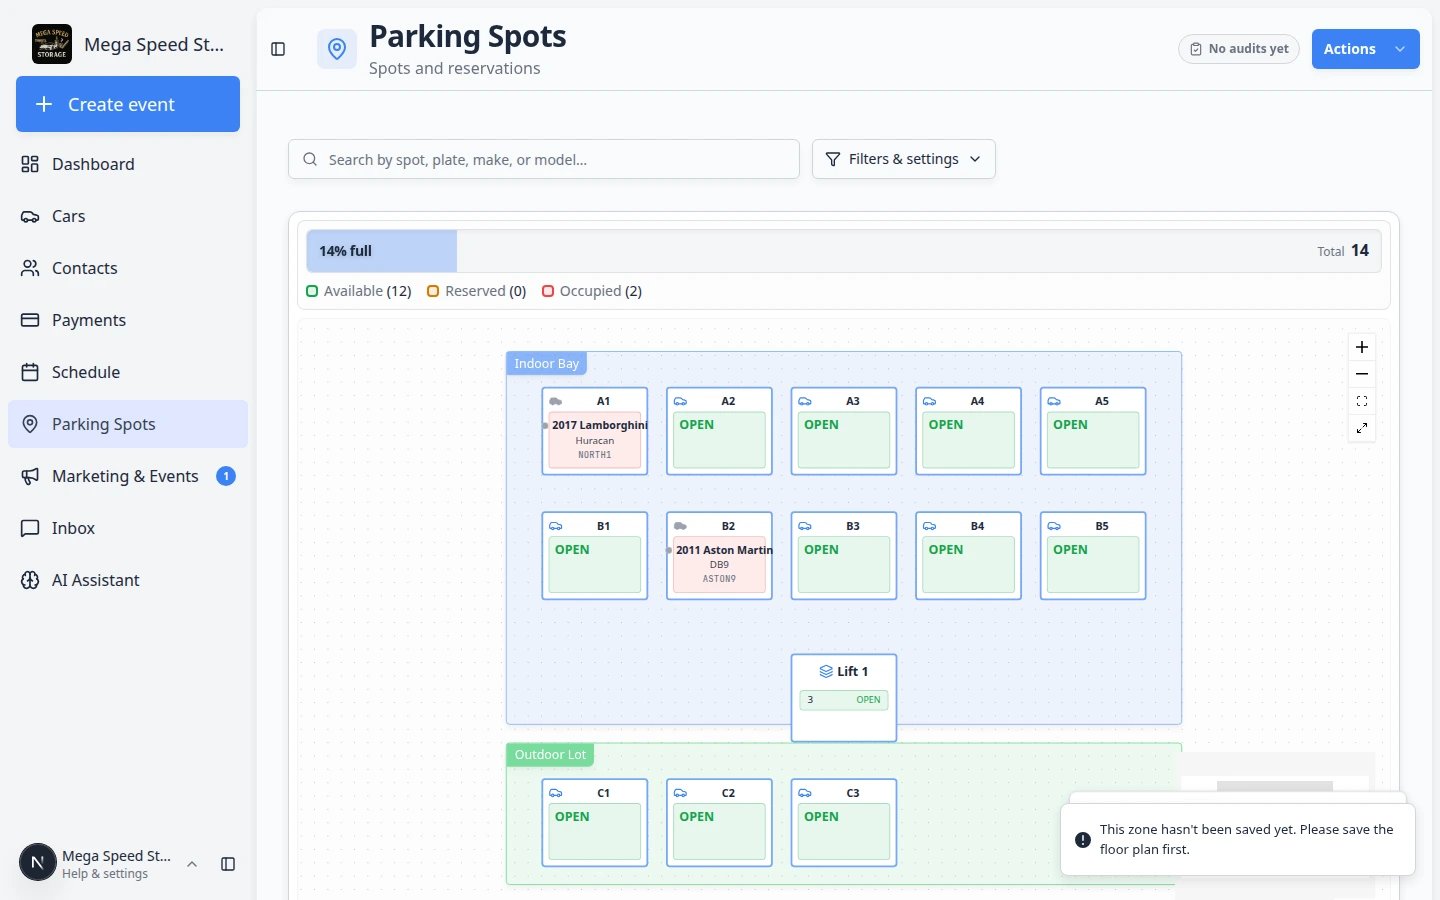
- If clicking a zone shows an error about the floor plan, ask an admin to open Settings > Floor Plan and click Save Floor Plan once, then refresh Parking Spots.
How zones look on the map
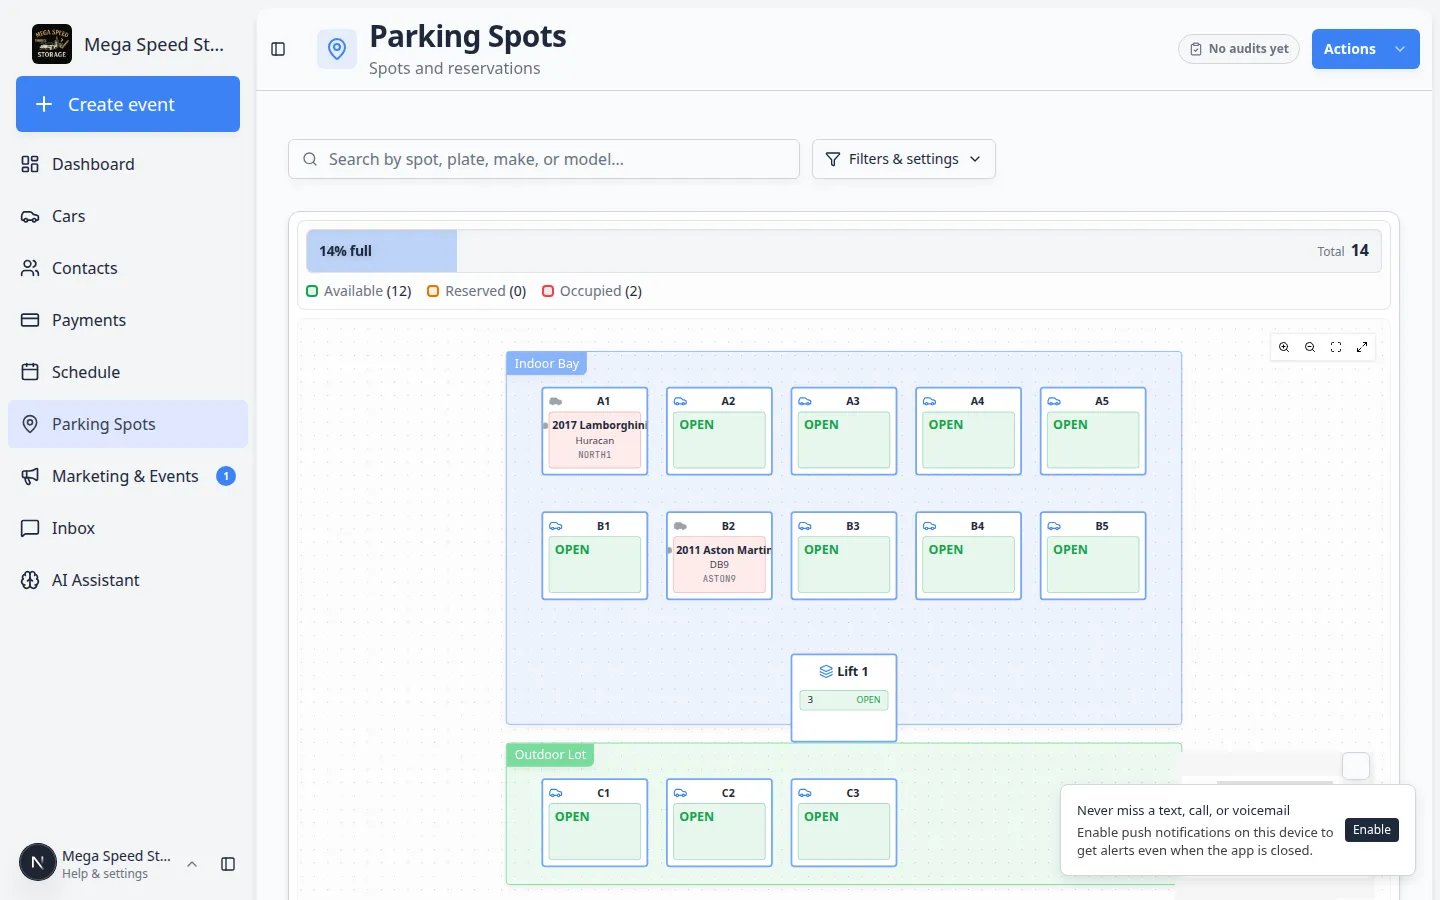
On Parking Spots in Map view:- Colored background areas (for example a green Outdoor Lot or blue Indoor Bay) are zones.
- Labeled boxes on top (for example A1, B3, Lift 1) are numbered spots or lifts.
- Click the open colored area between or around spots to open the zone—not a numbered box.
Open a zone from the map
1
Open Parking Spots
Go to Parking Spots from the left sidebar.Expected result: You see the facility map in Map view. Colored background areas are zones. Labeled boxes on top are numbered spots and lifts.
2
Click the colored zone area
Click inside a colored zone (for example the green Outdoor Lot area). Do not click a numbered spot box unless you want that exact space.Tip: If your screen is zoomed in, scroll or zoom out until you see open colored space between spot boxes. Click that open area—not the label on a spot like C1.Why this matters: Clicking C1 opens the spot dialog for C1 only. Clicking the green area around those spots opens the whole Outdoor Lot zone.Expected result: A window opens with the zone name at the top (for example Outdoor Lot) and a capacity summary such as 1/4.
3
Read the capacity summary
Near the top of the window, look for how many cars are in the zone and how many spaces remain (for example 1/4).Why this matters: Before you promise overflow parking, you can see whether the zone still has room.
Add a car to a zone
Use this when a vehicle is physically in the zone but does not need a numbered spot.1
Open the zone window
Click the zone on the Parking Spots map as described above.Expected result: The zone window shows the zone name and capacity at the top.
2
Search for the car
Use the car search field in the zone window. Type the customer name, license plate, VIN, make, or model.Expected result: Matching vehicles appear in the list below the search box.
3
Select the correct vehicle
If the customer owns more than one car, read the year, make, model, and plate carefully before you continue.Why this matters: Picking the wrong vehicle is one of the most common parking mistakes—and it is hard to fix during a busy drop-off.
4
Save the assignment
Click the button to add the car to the zone (the label may say Add to zone or Move Car Here).Expected result: The car appears in the zone’s car list. The map shows the car inside the colored zone area.
5
Confirm on the car record
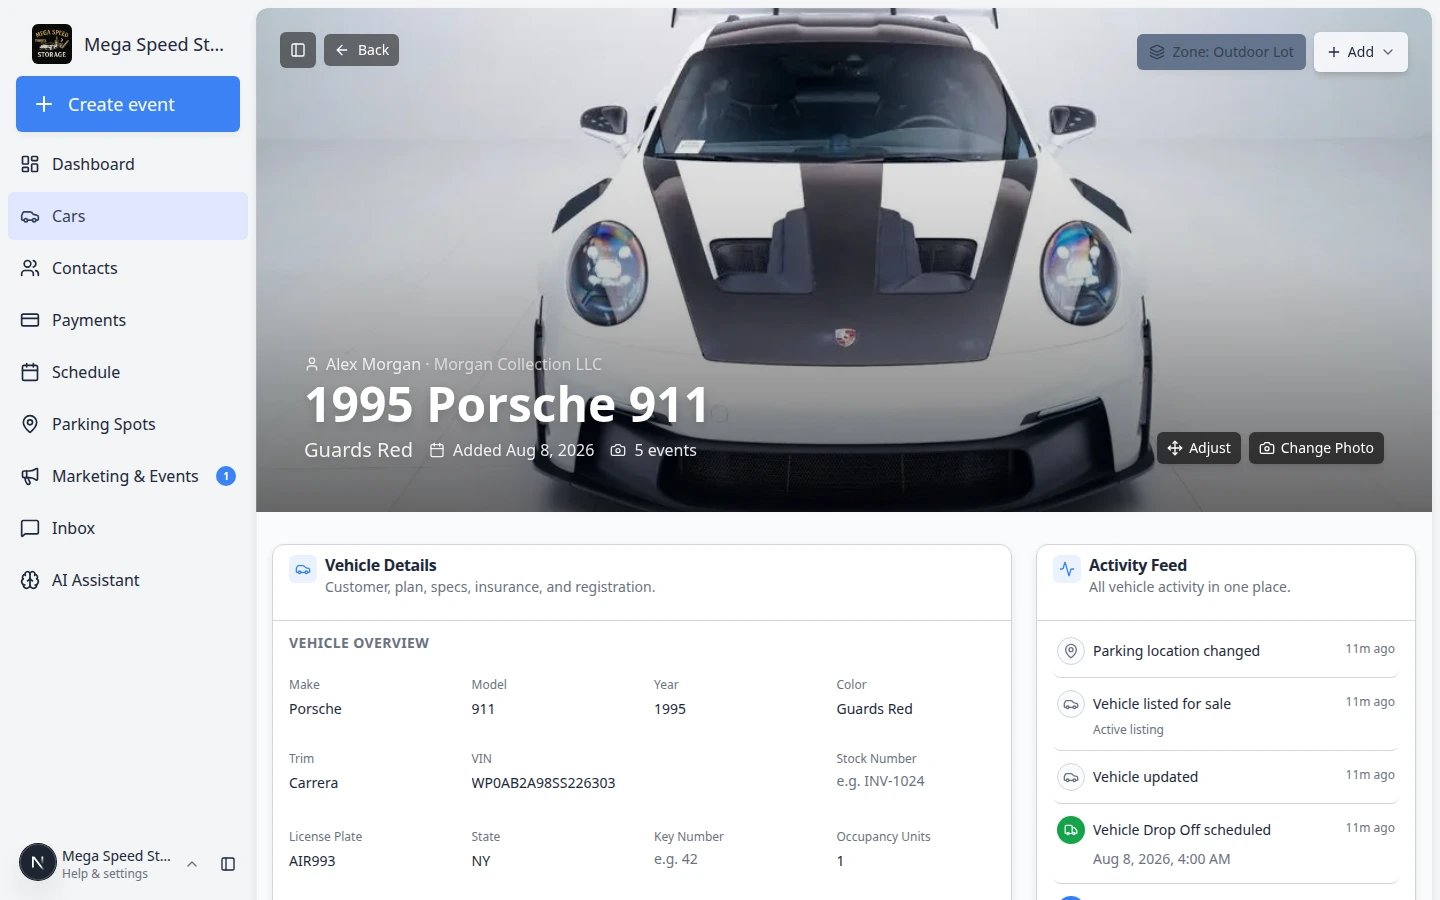
Open the vehicle in Cars. Near the top, the parking button should show Zone: and the zone name (for example Zone: Outdoor Lot).Why this matters: Staff who start on the car page—not the map—still see the correct location.
Move a car into a zone from a numbered spot
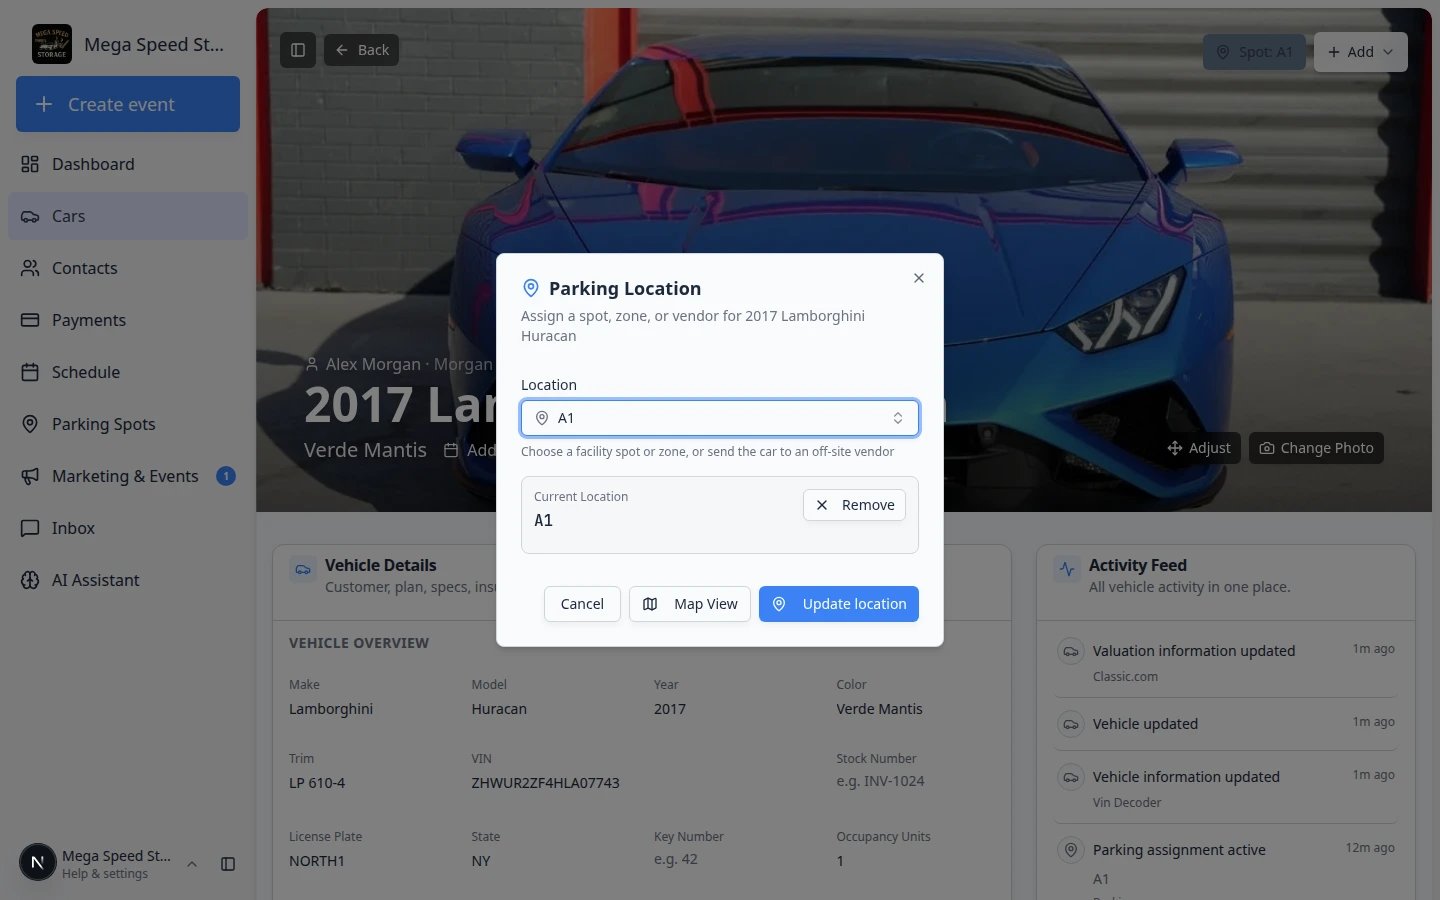
Many teams park cars in A1 first, then move them to overflow when the indoor row fills up. You can move a car to a zone without opening the zone window first.1
Click the spot where the car is now
On the map, click the numbered spot that currently holds the vehicle (for example A1).Expected result: A spot dialog opens showing the car that is Present there and a Move Vehicle or Move Car button.
2
Start Move Vehicle
Click Move Vehicle or use the Select spot, zone, or vendor… search field.Expected result: A search box appears where you can pick a new destination. You may see sections labeled Zones and Spots.
3
Search for the zone
Type part of the zone name (for example Out for Outdoor Lot). Under Zones, pick the zone and read the capacity numbers (for example Outdoor Lot 1/4).Why this matters: The fraction tells you how full the zone is before you save the move. 1/4 means one car is assigned and three more can fit.
4
Or pick a vendor when the car leaves the building
If the car is going off-site—not to another zone inside your lot—scroll to Vendors in the same picker and choose the outside company.Why this matters: A zone means the car is still on your property in a flexible area. A vendor means the car left entirely. See Send a car to an outside vendor.
5
Click Move and confirm
Click Move (or Move Car). Read any message about capacity before you confirm.Expected result: The old spot shows Available or open. The car appears in the zone list and on the car record as Zone: Outdoor Lot.
When a zone is full but cars are still outside
1
Walk the real lot first
Count how many cars are physically in the overflow area. The app only knows about cars your team recorded.
2
Move a car to a numbered spot if one opened up
If B3 or another indoor spot is now open, use Move Vehicle to pull a car from the zone into that spot. See Assign a parking spot.
3
Ask an admin about capacity only after the count is right
If the real lot still has room but the app says the zone is full, a manager can review Additional Capacity in Set up parking spots and zones.
Move or remove a car from a zone
1
Open the zone that holds the car
Click the zone on the map, or search for the car on Parking Spots and follow the map to its zone.
2
Find the car in the zone list
Scroll through the cars listed in the zone window. Each row shows the vehicle and owner.
3
Move the car to a numbered spot or another zone
Use Move (or Move Vehicle) to send the car to a numbered spot or a different zone. Pick the destination from the search list.Why this matters: Moving the record when the physical car moves keeps the map trustworthy for the next teammate.
4
Remove the car if it left your facility
If the vehicle is no longer on your property, remove it from the zone or update the car record so it no longer shows a parking location.
Zone capacity in plain English
Spot capacity counts numbered spots drawn inside the zone on the floor plan.Additional capacity (set in Settings > Floor Plan) is extra room for cars assigned directly to the zone without a numbered spot.Total capacity is both added together. Available is what is left before the zone is full.Example: Outdoor Lot 1/4 means one car is assigned to the zone and three more can fit before the zone is full.
How zones look in Table view
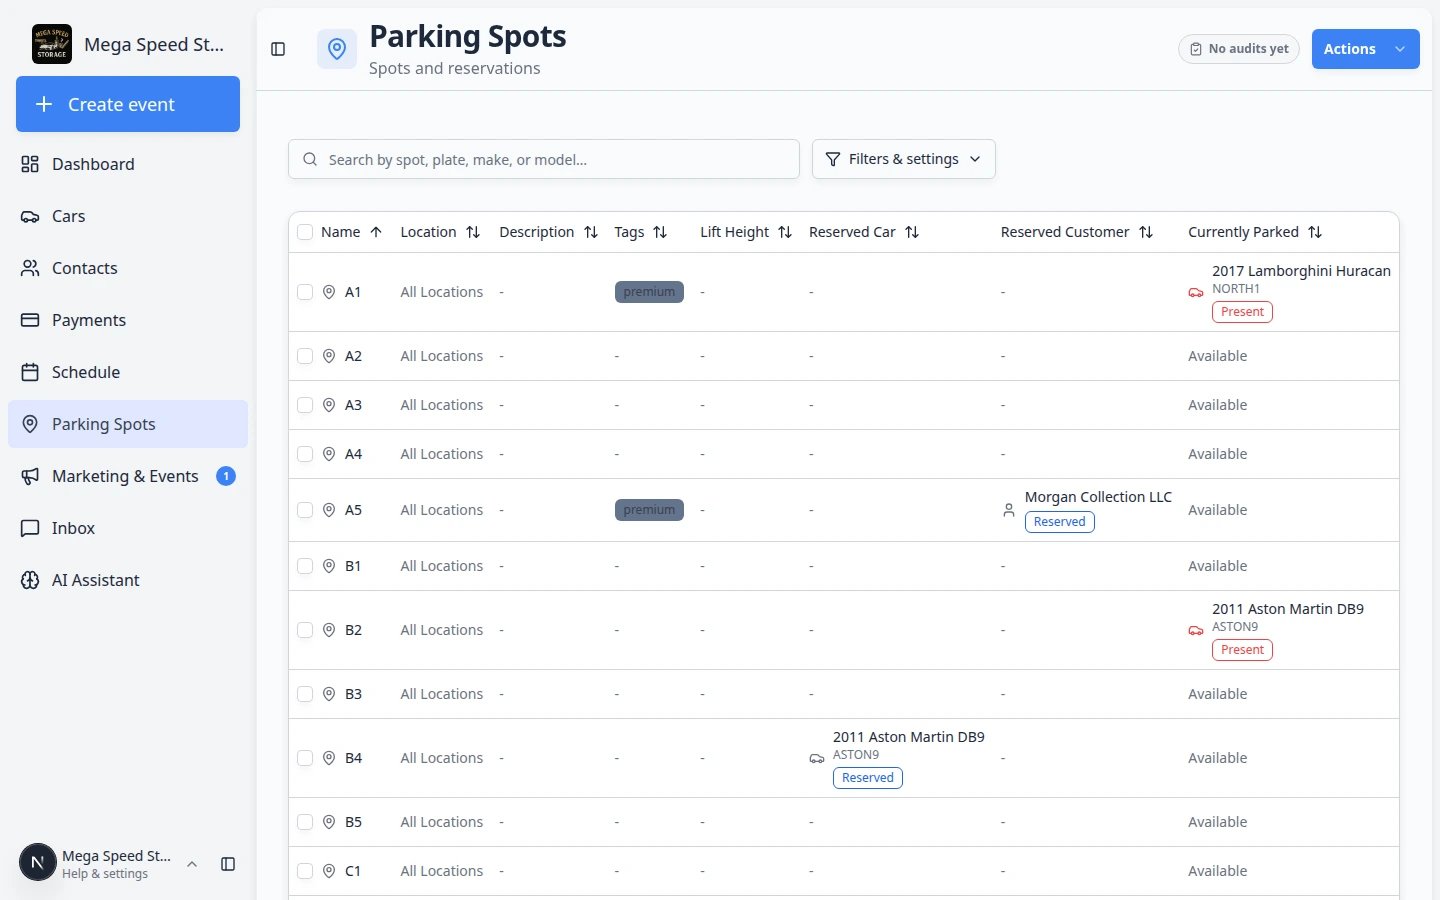
Zones also appear on the Parking Spots table:- The Location column may show a zone name for spots that sit inside a zone.
- Cars assigned only to a zone (no numbered spot) may not appear on a single spot row—they appear when you open the zone on the map or on the car record.
1
Switch to Table view
Open Filters & Settings and click Table.Expected result: You see rows for each numbered spot with columns such as Name, Currently Parked, and Reserved Customer.
2
Search for a zone name
Type Outdoor or your zone name in the Search box. Rows tied to that area may appear in the results.Why this matters: Table view is faster than the map when you need a sortable list during a busy afternoon.
3
Open the car record for zone-only assignments
If a car has Zone: Outdoor Lot on its Cars record but no spot row, that is normal—the car is tracked at the zone level, not on C1 or C2.
Common mistakes to avoid
- Do not click a numbered spot when you mean to use the whole zone—the spot dialog is for exact spaces only.
- Do not assign a car to a zone when your process requires an exact spot number for retrieval.
- Do not forget to update the zone when the car physically moves to a numbered spot inside the same lot.
- Do not promise a customer a zone spot when capacity shows 0 available—check the real lot first.
Troubleshooting
What success looks like
- Staff can name which cars are in Outdoor Lot (or your zone) without walking the lot.
- Zone capacity numbers on the map match what managers expect before promising overflow space.
- Car records show Zone: for flexible parking and Spot: for exact spaces—never the wrong one.
- Moves between numbered spots and zones are saved when the physical car moves, not hours later.
What to do next
- Need an exact space? Use Assign a parking spot.
- Need to hold a spot before arrival? Use Reserve a parking spot.
- Setting up zones for the first time? See Set up parking spots and zones.
- Return to the Parking Spots overview.