Documentation

How-to guides for Car Storage Software

Practical guides for setting up your facility, managing cars and customers, and running day-to-day operations.

Search documentation

Search documentation guides and how-to articles.

Browse documentation

Settings

Configure events and schedule settings

Understand the Events & schedule settings page so your team can set up services, plans, closed days, reminders, and booking tools in the right order.

Use this guide when you need to set up what customers can book, how staff schedule work, and which messages and reminders go out around appointments.

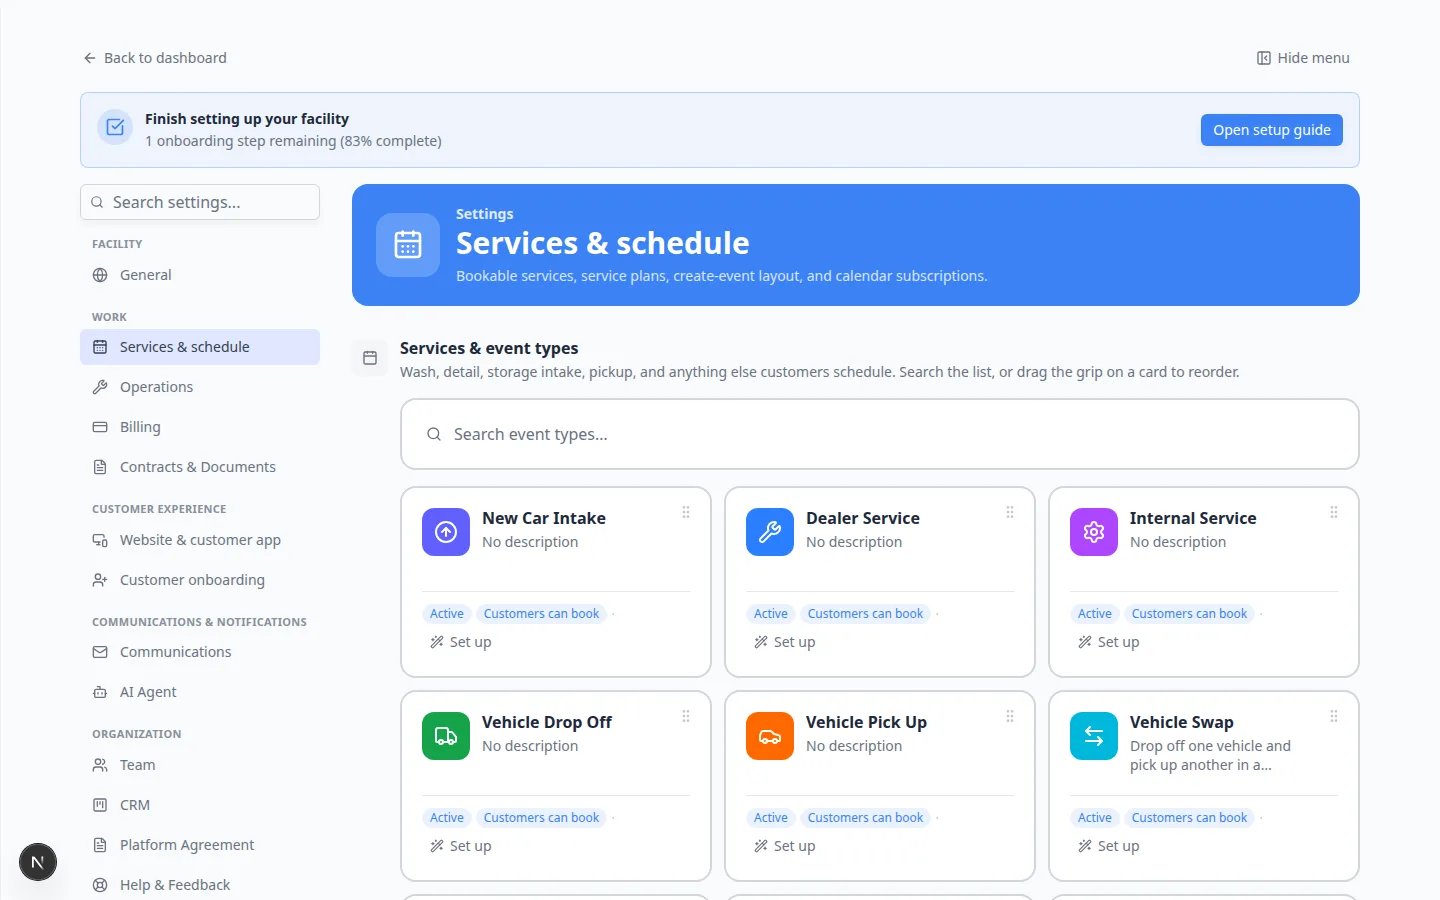
The Settings > Events & schedule page is the control center for services your facility offers. It is different from the Schedule calendar, where staff place events on specific days.

What you will accomplish

  • Know what each section on Settings > Events & schedule does.
  • Set up services and event types in the best order for your facility.
  • Connect service plans, closed days, reminders, and optional photo or resource tools.
  • Open the right detailed guide when you need step-by-step help for one topic.

Before you start

  • You should be signed in as a team admin or someone with permission to edit schedule settings.
  • Confirm General settings so your time zone is correct—appointments use this clock.
  • Write down the services customers ask for most (storage intake, detail, pickup, transport, tours).
  • Know whether customers will book online or only staff will schedule by phone.

Open Events & schedule settings

  1. Open Settings

    From the Dashboard, click Settings in the left sidebar.

  2. Choose Events & schedule

    In the Settings sidebar, click Events & schedule.

    Direct link: Settings > Events & schedule.

Expected result: The page title is Events & schedule. You see Services & event types at the top, then more sections as you scroll down.

Events and schedule settings page showing Services and event types table with Add Event Type button
Start at **Services & event types**. Each row is one kind of work your team can schedule—wash, detail, intake, pickup, and more.

Set up Events & schedule in the best order

Follow this order on your first setup. Each step builds on the one before it.

  1. Create your core event types

    In Services & event types, add the appointments your team books every week.

    Why this matters: Staff cannot schedule work until at least one event type exists. Customer booking also depends on types you mark as customer-facing.

    Expected result: Your list includes clear names such as Vehicle Drop Off, Detail Appointment, or Storage Intake.

    Follow Configure event types for full steps.

  2. Add service plans (if you sell recurring care)

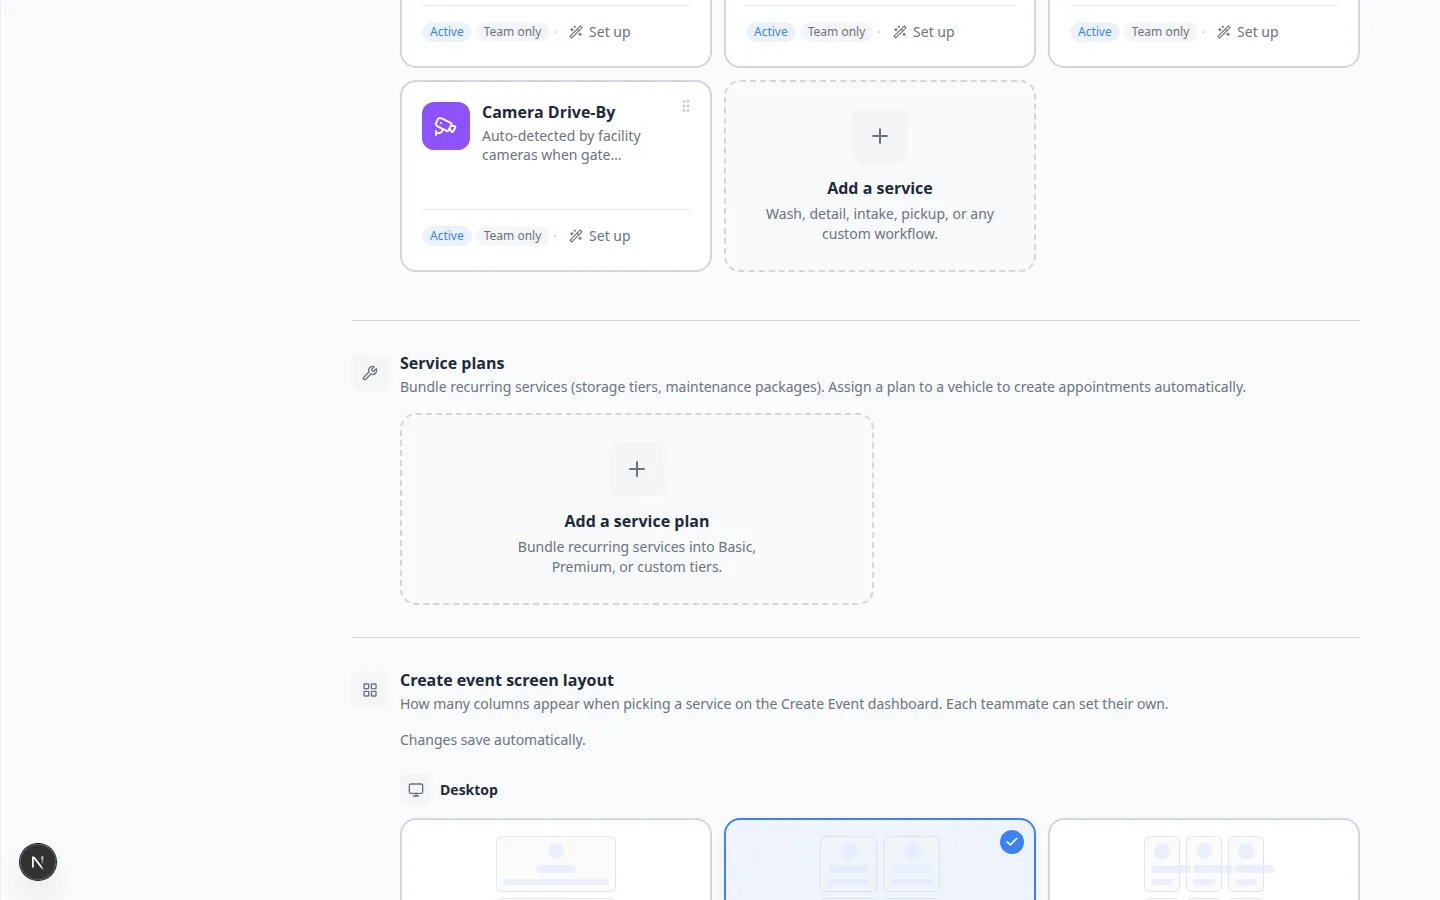
    Scroll to Service plans and create bundles such as monthly wash or quarterly inspection tiers.

    Why this matters: Plans tie recurring work to vehicles so the calendar can create future appointments automatically.

    Follow Set up vehicle service plans.

  3. Set walkthrough photo defaults

    In Walkthrough photos, choose whether damage annotation opens automatically when staff capture photos during a job.

    Each event type can override this later in that type's own settings.

    Expected result: Your team has a consistent default; detail bays might turn annotation on while quick drop-offs leave it off.

  4. Events and schedule settings showing Walkthrough photos section with toggle for auto-open damage annotation
    **Walkthrough photos** sets the team default. Open an individual event type with **Edit** if one service needs different photo behavior.
  5. Adjust Create event screen layout (optional)

    Scroll to Create event screen layout on Settings > Events & schedule.

    Choose how many columns appear on Desktop and Mobile when staff open Create event. Most facilities use 2 columns on desktop and 1 column on phones so buttons stay large enough to tap with gloves or on a moving cart.

    Why this matters: A shop with many services may want 3 columns on a wide monitor so staff see more cards at once. A valet team on phones often prefers 1 column so each event type is easy to hit.

    Expected result: Each team member can pick their own layout. Changes save automatically—there is no Save button on this section.

    For a full walkthrough with examples, read Customize Create event screen layout.

  6. Block closed days for the whole facility

    In Closed days for the whole shop, add holidays or full-facility closures.

    Why this matters: Online booking and staff scheduling respect these dates so customers cannot book when you are closed.

    Follow Set closed days for events.

  7. Set default messages for new services

    Default texts & emails for new services are the starting on/off switches when you add a future event type.

    You can still customize each service later.

    Follow Set up event notifications and reminders.

  8. Set default reminders before appointments

    Scroll to Default reminders before appointments (sometimes grouped under communications defaults on the same page).

    Add at least one reminder—many facilities start with 30 minutes before on the calendar invite so technicians get a phone alert before a bay opens.

    Use Add reminder to stack more nudges (for example 1 day before by email). Each new event type you create can inherit these defaults unless you override them inside that service's Edit screen.

    Expected result: New services inherit sensible reminders without re-entering the same rules every time.

    For message wording and per-service overrides, read Set up event notifications and reminders.

  9. Subscribe to your schedule (optional)

    Scroll to Subscribe to your schedule near the bottom of Settings > Events & schedule.

    Click Copy subscribe URL to paste into Google Calendar or Outlook, or Open in calendar app on a Mac or iPhone.

    Why this matters: Each staff member gets their own read-only feed. The calendar refreshes on its own schedule—your team does not need to export PDFs every week.

    Follow Subscribe to the team calendar for Apple, Google, and Outlook steps.

Events and schedule settings showing Create event screen layout with desktop and mobile column options
**Create event screen layout** lets each staff member choose 1, 2, or 3 columns on [Create event](/dashboard). Pick fewer columns on phones so buttons stay easy to tap.
Events and schedule settings showing Default reminders before appointments with a calendar reminder 30 minutes before
**Default reminders before appointments** become the starting point for every new service. Add at least one reminder before you turn on customer booking.
Events and schedule settings showing Subscribe to your schedule with Open in calendar app and Copy subscribe URL buttons
**Subscribe to your schedule** gives each teammate a personal calendar feed. Use **Copy subscribe URL** for Google Calendar or Outlook.
Events and schedule settings scrolled to Service plans section with plan list and add button
**Service plans** bundle recurring services. Assign a plan on a vehicle to create future appointments on [Schedule](/dashboard/schedule).
Events and schedule settings showing Closed days for the whole shop with holiday dates listed
Add facility-wide closed days here. You can also block dates on a single service inside that service's own settings.

Extra booking tools (when you need them)

Scroll to the bottom of the page for Extra booking tools. Most facilities only need the sections above.

ToolWhen to use itDetailed guide
Photo rulesJobs must include required photos (intake, damage, completion)Configure photo rules
Bookable resources listStaff must reserve a specific bay, lift, or room when bookingSet up bookable resources

What each section on this page does

  1. Services & event types

    The master list of schedulable work. Add, rename, reorder, turn off, or open Edit for one service.

  2. Service plans

    Recurring care packages (storage tiers, maintenance bundles) linked to vehicles.

  3. Walkthrough photos

    Team-wide default for opening damage annotation during photo capture.

  4. Create event screen layout

    Column layout for the staff Create Event picker on desktop and mobile.

  5. Closed days for the whole shop

    Holidays and full-facility closures that block booking everywhere.

  6. Default texts & emails for new services

    Starting notification switches applied to newly created event types.

  7. Default reminders before appointments

    Calendar and message reminders before appointments start.

  8. Subscribe to your schedule

    Personal calendar feed links for staff.

Test before customers book online

Walk through this short checklist after you finish the sections above. It catches the mistakes customers notice first.

  1. Create a test appointment on Schedule

    Open Schedule and book a test event using a new event type.

    Expected result: The event appears at the correct time in your facility time zone.

  2. Run through customer booking (if enabled)

    If customers can self-book, open your booking widget or portal and try one test reservation.

    Follow Test an event setup.

  3. Confirm reminders and messages

    Check that confirmation or reminder settings match what you promised customers on the phone.

  4. Assign a service plan on one test car (if you use plans)

    Open a vehicle on Cars, scroll to Service Plans, and assign the plan you created.

    Expected result: The car record shows the plan name and start date. Optional: turn on the Service column on the Cars list to see plan health at a glance. See Assign service plans on a vehicle.

Common mistakes to avoid

  • Do not turn on customer self-booking before hours and closed days are set—customers may book when you are closed.
  • Do not create service plans before the underlying event types exist—plans need real services to schedule.
  • Do not skip the facility time zone in General settings. Schedule always uses that clock.
  • Do not edit only the page-level defaults when one service needs different rules—open that row with Edit in Services & event types.

Troubleshooting

What to do next